Creating Flash Website with Moto CMS Standalone — Part 1
With this post we are starting the series of articles that is going to cover all the steps and aspects of a Flash website creation with Moto CMS (standalone version). And today we would like to present you the CMS overall, its main components and utilities as well as give you a short description on how to install Moto CMS to the local or remote server.
Moto CMS standalone version has been created for making Flash developers’ lives easier and turn the process of a Flash website creation into a pleasant, exciting and easily accomplished task.

The standalone version mainly aimed at experienced developers. It contains the set of components, utilities as well as several design samples that can be used in Flash CMS website development. There is no need to install additional software — all you need for the website development is already included into Moto Flash CMS.
[th_ft count=”4″ title=”Pick a Design for Your New Website!” cat=”” type=”36″ keyword=””]
In order to start a Moto CMS based website creation process, a developer will only need:
- Adobe Flash CS3 (or higher);
- Moto CMS (standalone version or free Trial);
- Website design in .PSD format (Adobe Photoshop is required).
MotoCMS grants an opportunity to try the standalone version free of charge during 30 days. The Trial Version has no limits and completely corresponds to the original product. So, you are not limited within the control panel, can freely create a complete CMS based Flash website, and then edit and manage it with no limits.
You will get the following set of components within the standalone version:
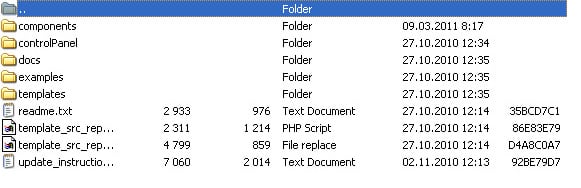
Components — the folder with the MXP component that runs on the basis of Adobe Extension Manager;
ControlPanel — a folder with all the control panel files;
Docs — the folder with the API documents;
Examples — the folder with complete Flash websites based on Moto CMS with all standard modules, widgets and tools embedded.
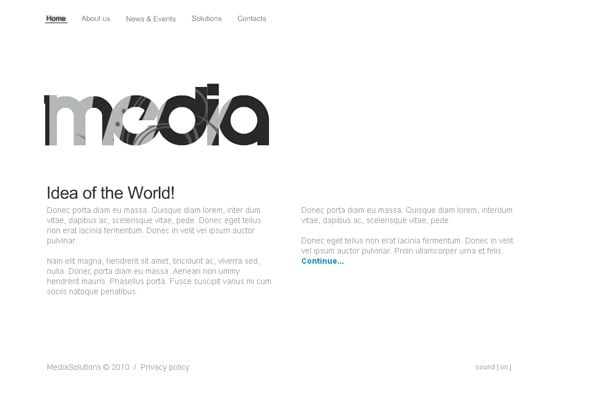
Templates — the folder that contains five web templates that can be used as a basis for your Flash website:
- Moto Template 01 – one layout with transitions between pages;
- Moto Template 02 – two layouts without returning to the first one, with transitions between pages of the second layout;
- Moto Template 03 – two layouts with returning to the first one, with transitions, between pages of the second layout;
- Moto Template 04 – two layouts with returning to the first one, with transitions between pages of the first and second layouts;
- Moto Template 05 – three layouts without returning to the first one, without transitions between pages of the second, with returning from the third to the second and with transitions.
Readme.txt — the text document that describes the components that are in the box, the installation requirements and the process itself as well as the Help & Support links.
The Moto CMS package includes the set of advanced components that make the website development easy and comfortable. The system opens the widest opportunities for developers; they can create manageable Flash websites or components for them. Moreover, with Moto CMS it is possible to maintain already created Flash website.
In order to start working with Moto CMS, you need to download the files by registering the Trial or purchasing Moto CMS standalone, and launch on localhost the website template from the samples you have downloaded with other Moto CMS files, or you can use your own website design in .PSD format.
To install Moto CMS (a standalone version) either to the local or remote server or you should take the next steps:
1. Copy the «admin» folder together with the control panel to the server. Copy any website sample (for example, exampleswebsiteExample_04) into the same folder overwriting the existing files. Then go to http://yourwebsite.com/admin/ to access to your control panel (if you get the access for the first time, you will be asked to activate it).
2. Please, activate your product on http://accounts.cms-guide.com/ (Your account details will be sent to your e-mail after you have purchased Moto CMS), and refresh your browser page.
3. In order to start the website creation please install Moto Flash CMS components (MotoCMS.mxp).
4. Start your work with Moto CMS by trying to compile the suggested website samples from Flash IDE. Use moto.flp for simultaneous .fla files compilation.
Learn more about Moto CMS installation process on http://www.cms-guide.com/installation-manual/
If you are not an experienced developer, but would like to try create a Flash website without a professional’s help, we would recommend you to choose a Flash Template from the premium Moto CMS collection. A 30 day FREE Demo is available.
Please read the Part 2, Part 3, Part 4 and Part 5 of the tutorial.
To be continued…


[…] is the Part 2 of our series on how to create a Flash website with Moto CMS Standalone. In the Part 1 we have presented you the Flash CMS overall, its main components; we also described the Moto CMS […]
Can i have the tutorials as PDF please
@Thorsten
Unfortunately, we don’t provide the tutorials in.pdf format so far, but thank you for a good idea. We might think about giving such an opportunity to our readers in future.
I’m interested with the developer $99 price like to know wheter the price is recurring or one time payment only?
If i buy the template can the template integrate with my domain and can i edit it locally first then publish after finish editing? or do i need to edit it online.
@icute
After your application is approved, and you become a MotoCMS website developer, you will get one MotoCMS license for free, and all next licenses (for MotoCMS standalone) will cost you $99 each.
Regarding the templates, after you purchased one, you may edit it locally and then install it to local server with your domain name. The instructions on how to install and edit the templates are included in the MotoCMS template pack. If you have any questions, you can always contact our support by submitting a request: at http://support.cms-guide.com/anonymous_requests/new.
[…] is the Part 3 of our series on how to make Flash website with Moto CMS standalone. In the Part 1 and Part 2, you learned about Moto Flash content management system and its main components, passed […]
[…] is the Part 3 of our series on how to make Flash website with Moto CMS standalone. In the Part 1 and Part 2, you learned about Moto Flash content management system and its main components, passed […]
[…] the Part 4 of our tutorial series on how to create Flash website with Moto CMS standalone. From the Part 1, Part 2 and Part 3 you learned to create a simple website. In the Part 4 we will teach you to […]
[…] Part 1 […]
[…] Part 1, Part 2, Part 3, Part 4. […]
Can we insert our own logo into your template?
Can we insert our own company logo into your template?
Sure, you can easily add your company logo as well as other elements to your Moto CMS website via the control panel.
web design…
[…]Creating Flash Website with Moto CMS Standalone — Part 1 | MotoCMS[…]…
web design packages…
[…]Creating Flash Website with Moto CMS Standalone — Part 1 | MotoCMS[…]…