Creating Flash Website with Moto CMS Standalone — Part 2. A Simple Website
Here is the Part 2 of our series on how to create a Flash website with Moto CMS Standalone. In the Part 1 we have presented you the Flash CMS overall, its main components; we also described the Moto CMS installation process to the local or remote server. And in this second article we are going to pass through the process of a very simple Moto CMS website creation from the beginning to the end. We’ll create a preloader, set a background for our website, create a title, modify the existing menu and also add a new simple bottom menu to the Home Page.
As a basis for our Flash CMS website we are going to use one of five templates (five blank patterns for website development that differ by structure) included into the Moto CMS pack. Let’s take the 1st template for our website.
![]()
So, after we have installed Moto CMS to the server, edited config.xml (the website width, height), edited Style CSS (specified the background color), it’s time to create a preloader for our simple Flash website…
Creating a Preloader
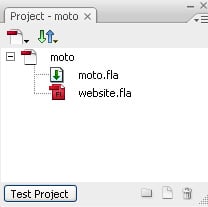
1. Now we need to open moto.flp file in Adobe Flash CS3 (templates/template_01/moto.flp). There are two files in the Project panel: moto.fla and website.fla. We need to set moto.fla as default file and then click on the “Test Project” button to compile these two files.
2. Since we have taken one of the templates included in the package, the moto.fla file already contains a Movie Clip of the preloader. It’s placed on the appPreloader layer.
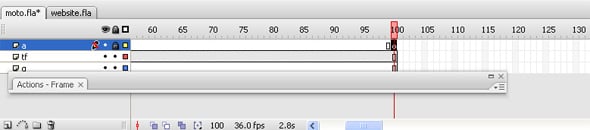
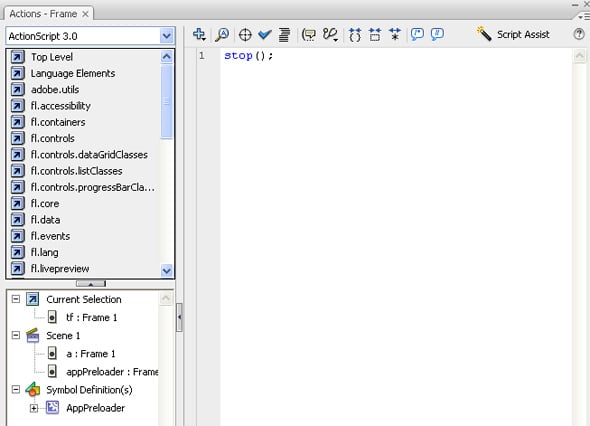
So, we just open the Movie Clip and create animation on 100 frames of timeline. We should also add the “stop();” code to the last (100th) frame of the “a” layer.
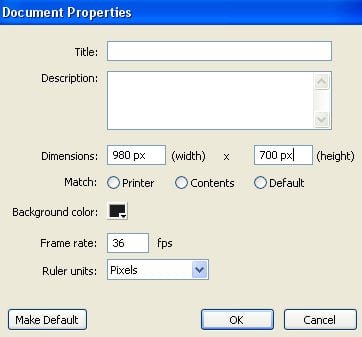
3. Then we will specify the website dimensions (minimal width and height) in the moto.fla file properties (Modify — Document):
4. As the last step, we will create animation of the preloader disappearance.
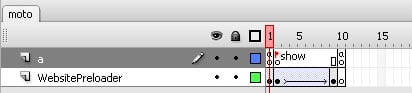
We should launch the website on the last frame and activate “showWebsite ( )”.
Now we should update the preloader (we need to open the website.fla file for that).
Setting Website Background
Let’s set a background for our website. For that we’ll open Media Library within the control panel and upload the image we wish to use for the website background by clicking on the “Add Media” button. Together with the background image, we will also upload other images that we are going to use when designing our website.

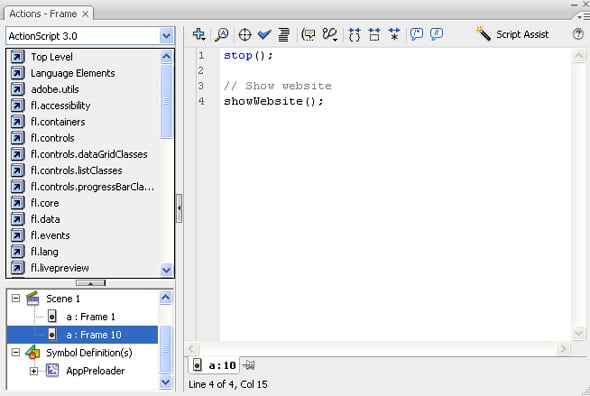
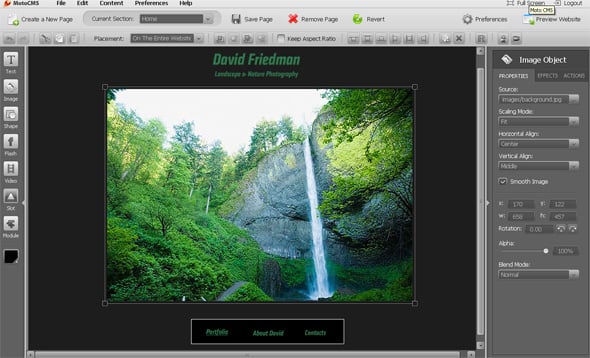
Now let’s come back to the control panel in order to insert the background image for the website. For that we need to click on the “Add New Image” button and select the image from the Media Library. Then we click on stage to insert the image and then center it.
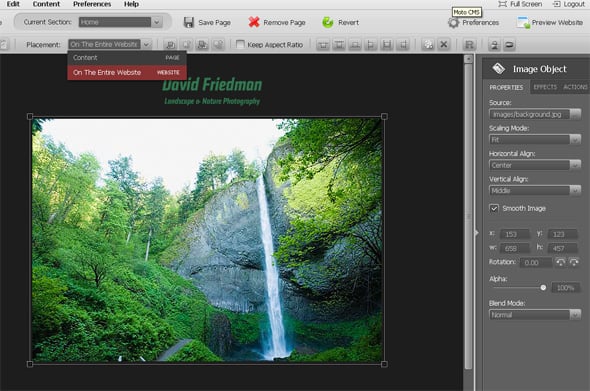
In the “Placement” section of the horizontal tools panel we’ve selected “On The Entire Website”.
Creating Title
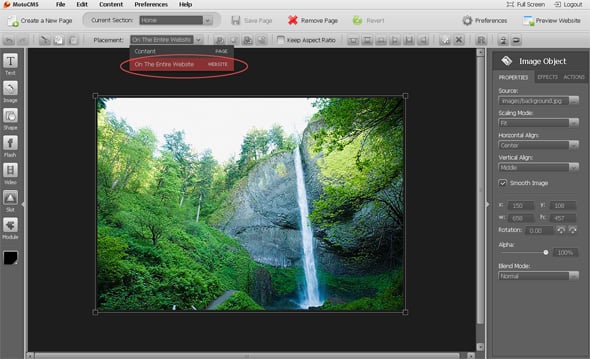
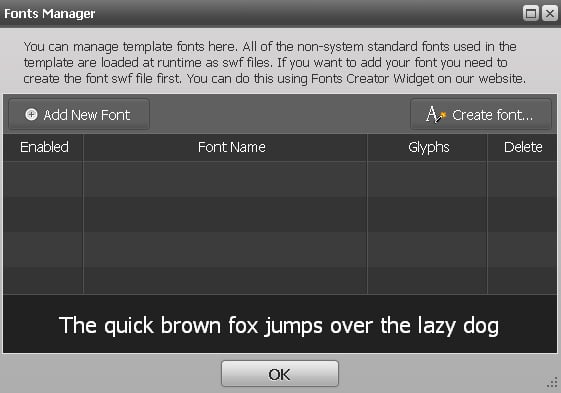
1. For our new website we are going to use a font we’ve selected beforehand for our design. In order to add it to the control panel, we go to Preferences — Fonts Manager.
With the help of Moto CMS Fonts Manager we can manage the website fonts in .swf format.
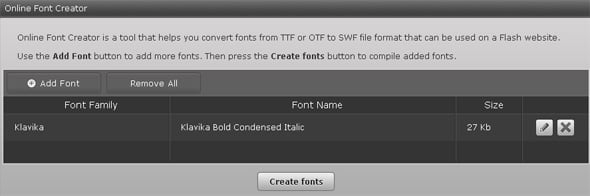
2. Our font hasn’t been converted to .swf format yet, so we are clicking on the “Create Font” button to open Online Font Creator. We are clicking on the “Add Font” button to select and add the font in .ttf format. Click on the “Create Font” – the font compilation process will start.
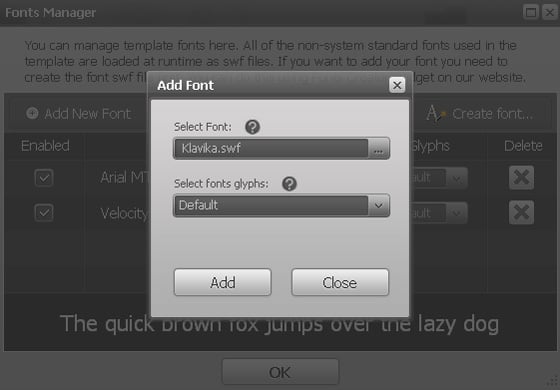
3. After the font has been compiled to .swf, we need to upload it to the control panel. Let’s go back to the Fonts Manager and add the converted .swf file to the control panel:
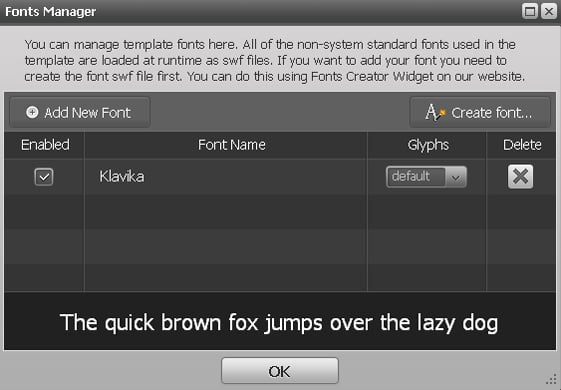
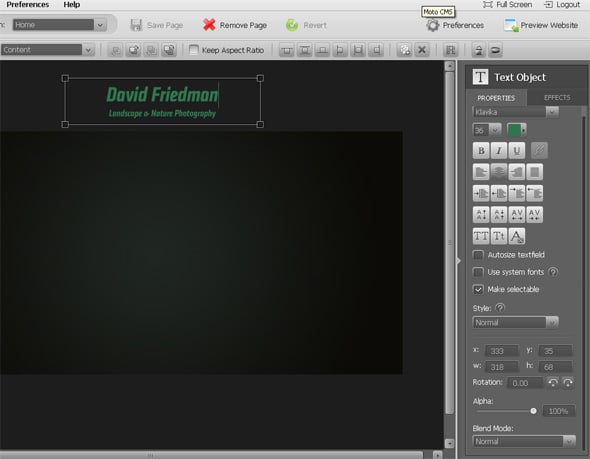
4. It’s time to create a title for our Flash website: we are going to use the Text Tool for that. So, we have selected the newly added font “Klavika”, font size 36, 16, Normal Mode.
We have already touched the subject of the Fonts Embedding in our articles. For more detailed info please read Embedding Fonts into Moto CMS Website: Examples, Pitfalls and Best Practices.
Adding an Image to the Home Page
Let’s add an image to the home page. For that we need to click on the “Add New Image” button and select the image from the Media Library. Then we click on stage to insert the image and then center it.
Creating (Modifying) the Menu
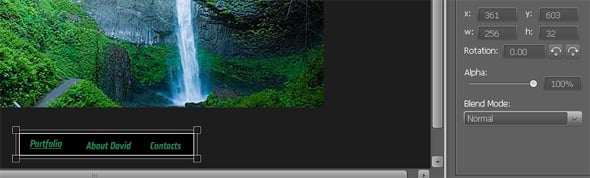
1. There is a special menu widget within Moto CMS, but for our simple website we will create a simple menu (for example, the bottom one) in a very easy way — by means of the Shape Tool (we add a rectangle) and Text Tool (add menu buttons and place them on the rectangle). Due to the Links Editor that can be found in the Text Object menu, each text object of our simple menu may be linked to the necessary website page.
2. It is also possible to create a vertical menu within the control panel as well as submenu for it. You will find a detailed Tutorial on how to create a Vertical Menu and a Submenu to it on our Forum.
3. Now we’ll save all the changes and preview the modified simple website:
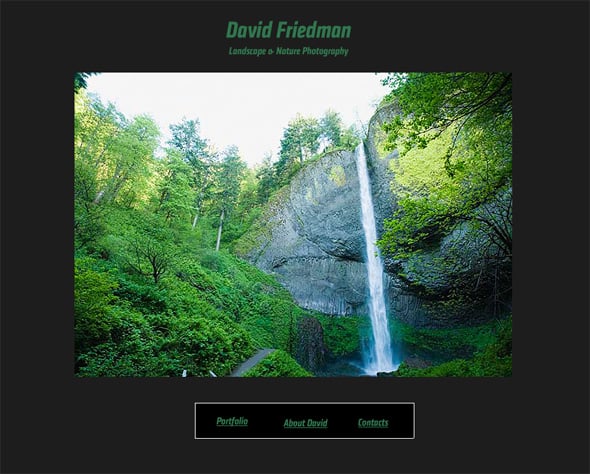
That’s it — our simple Flash CMS based website is ready. In our next posts we will make our simple website more advanced: we are going to create content holders, edit the image preloader, create animated elements for the website, and much more. Also, we will create the “About Page” for our website.
You have a great opportunity to evaluate the Moto CMS Standalone before the purchase by registering a 30 Day Free Trial and try to create a simple Flash website by yourself!


[…] the Part 3 of our series on how to make Flash website with Moto CMS standalone. In the Part 1 and Part 2, you learned about Moto Flash content management system and its main components, passed through the […]
[…] read the Part 2, Part 3, Part 4 and Part 5 of the […]
[…] 1, Part 2, Part 3, Part […]
[…] 4 of our tutorial series on how to create Flash website with Moto CMS standalone. From the Part 1, Part 2 and Part 3 you learned to create a simple website. In the Part 4 we will teach you to animate the […]