Creating Flash Website with Moto CMS Standalone – Part 5: Holders Animation
Here is the final Part 5 of the series on how to create Flash website with Moto CMS standalone. Today we will learn to animate holders and finish our Flash CMS website. At the end of the article you will see the final result of our Moto CMS based Flash website.
Previous Parts of the Tutorial:
Part 1, Part 2, Part 3, Part 4.
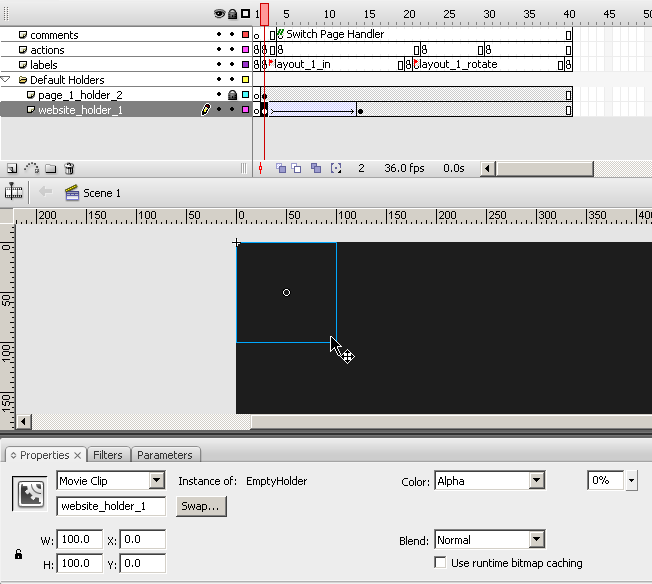
Let’s start animating holders. Now we go to the main timeline. At the moment our website has two holders, which are placed on layers “website_holder_1” and “page_1_holder_2”. We’ll make a simple animation of these holders. Let’s start from the website_holder_1. We create a new keyframe on layer “website_holder_1”, go to the first keyframe and set the Movie Clip Alpha = 0%. Then we create a Motion Tween between these two keyframes.
Now this holder will appear from transparency on the website startup. Let’s make the same animation for page_1_holder_2.
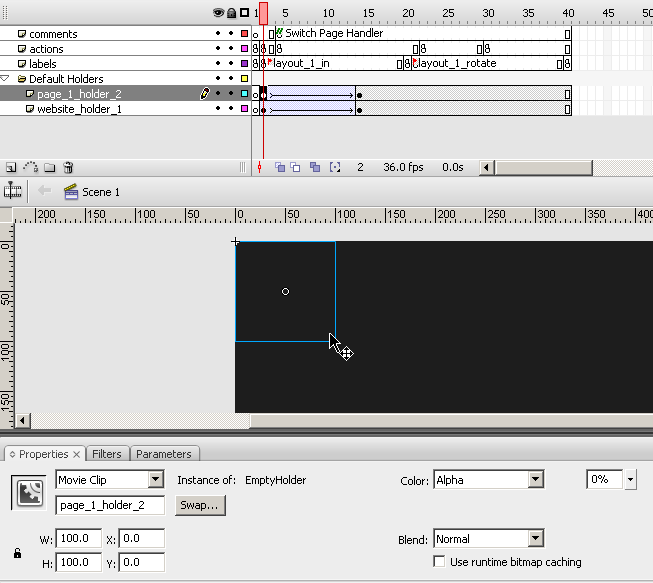
Website_holder_1 is the website-level holder, so it’s enough just to make an animation of its appearing. But the content of page_1_holder_2 is changed on page switching, so we’ll make an animation of this change. Let’s create new keyframes on the timeline:
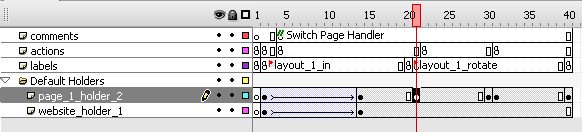
Then we go to the fourth keyframe on the timeline and move the Movie Clip to the right. We also set its Alpha = 0%.
Let’s select the next frame and move the Movie Clip to the left. We should set its Alpha = 0% too.

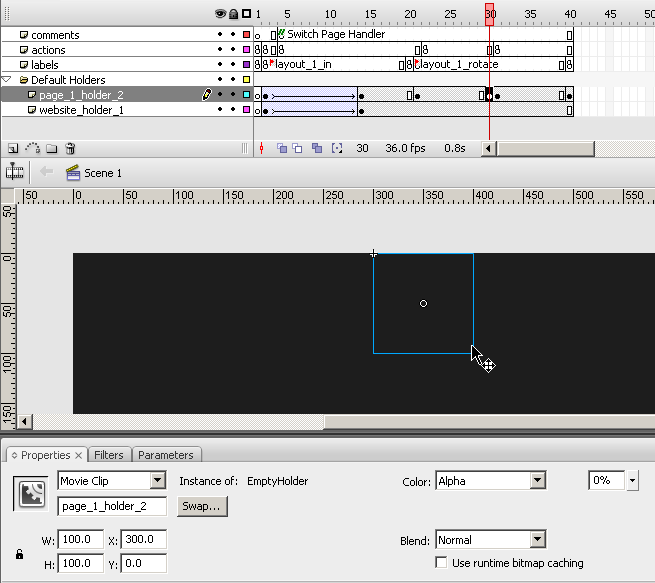
Now we add Motion Tweens between the new keyframes. The first tween will make the content go to the right and disappear, and the second will make the content appear from the left. Let’s also set Ease -100 (in) for the first tween and 100 (out) for the second.
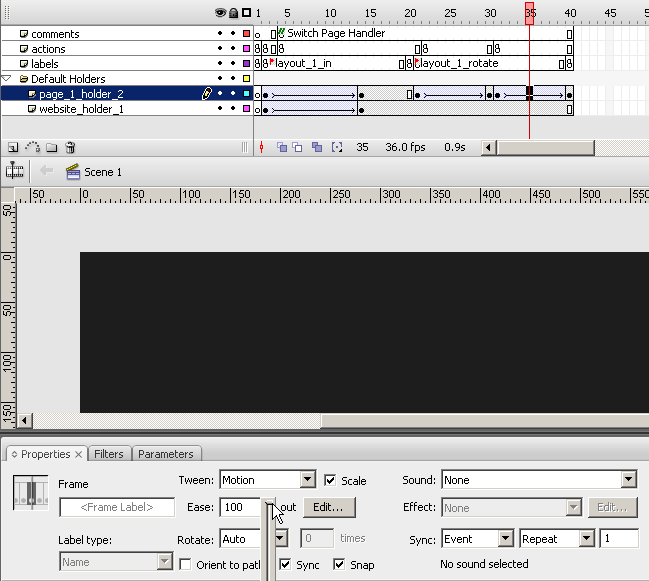
There is the code which adds content to the holder in frame 22 on the “actions” layer. We should put this frame over the keyframe where the Movie Clip disappears (frame 30 in our example). This way the content will be cleared in the end of the holder’s disappearing animation. In the next frame the new page’s content will be added to the holder and it will appear from the left.

If we re-size our website, we can see that the content is not centered vertically. Let’s open MotoWebsite.as, which is placed in the “src” folder, and apply comment to this line:
//stage.align = StageAlign.TOP;
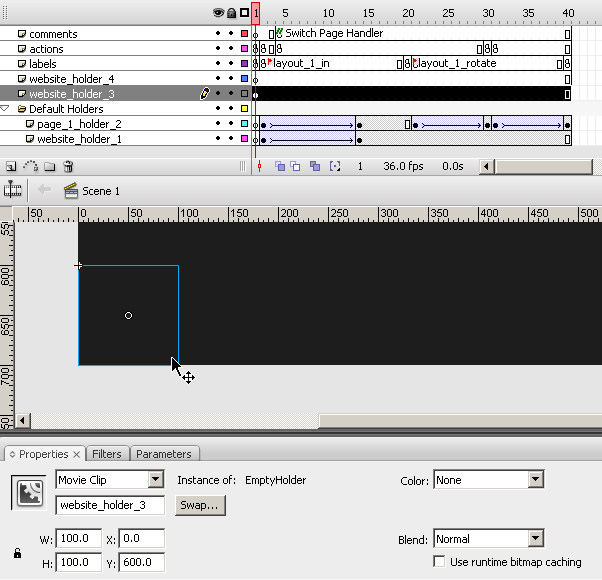
Now we can compile our project and see that all the website content is centered. But it would look better if only the page content was centered, but company name and the bottom menu buttons were stuck to the top and the bottom, respectively. We’ll create two new holders. Let’s go the main timeline of website.fla and create two layers. We’ll name them website_holder_3 and website_holder_4. Then we select the first frame of layer “website_holder_3”, open Template Elements – Holders in the library, and drag the EmptyHolder to the stage. It will be the bottom holder, so let’s move it down. We should give it an instance name “website_holder_3”.
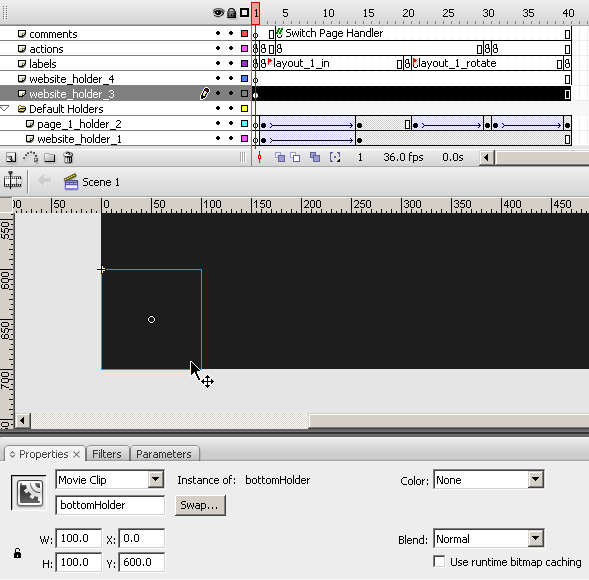
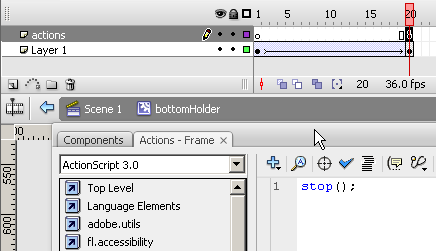
We press F8 to convert it to one more Movie Clip. Let’s name it bottomHolder and give it the same instance name.
We open this Movie Clip, create a new keyframe on the timeline, and move the holder down in the first keyframe. Then we add a Motion Tween between these keyframes. This way the holder will appear from the bottom on website startup.
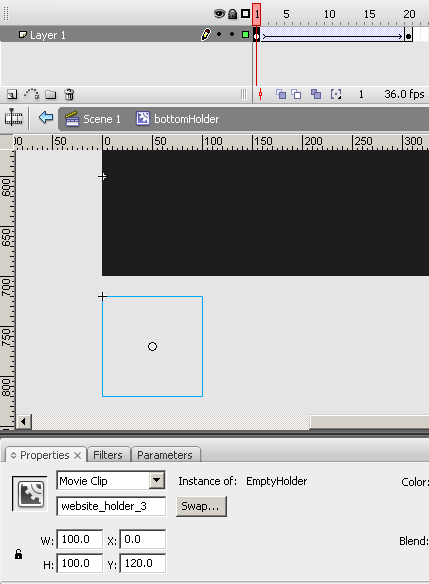
We should also insert a new layer, create a keyframe in the end of animation, and put the “stop();” code there.
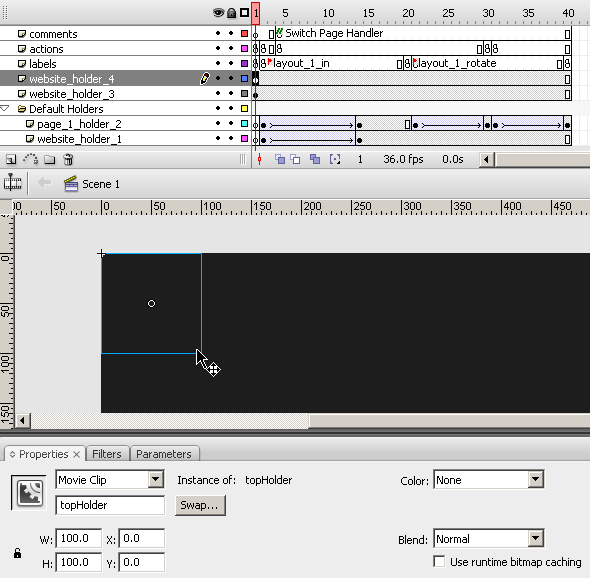
Let’s create the top holder by analogy. We’ll name it topHolder instead of bottomHolder, and we’ll use website_holder_4 name instead of website_holder_3. It should be placed at the top as it is the top holder.
We can make an animation of appearing from the top inside the topHolder Movie Clip, but we won’t do it in this example as our Company Name slot has its own animation of appearing.

Let’s also move the new Movie Clips to the Holders folder in the library to keep all the elements arranged. Now we should get back to the main timeline, move the first keyframes of website_holder_3 and website_holder_4 layers to the second frame, and open the code in frame 2 of the actions layer.
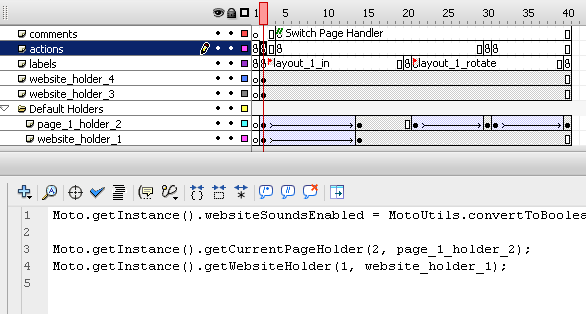
We need to add these two lines of code, which will assign the content to the holders:
Moto.getInstance().getWebsiteHolder(3, bottomHolder.website_holder_3);

Moto.getInstance().getWebsiteHolder(4, topHolder.website_holder_4);
3 and 4 are the holders’ IDs, which will be specified in structure.xml later. Then we add the logic of the holders’ positioning. Top holder will always stay at the top, and the bottom holder will be stuck to the screen bottom:
stage.addEventListener(Event.RESIZE, resizeHandler);
function resizeHandler(event:Event = null):void
  {
    bottomHolder.y = int((stage.stageHeight/2)+250);
    topHolder.y = -int((stage.stageHeight-700)/2);
  }
resizeHandler();
We can compile the project in Flash now. Then we open structure.xml to add two new nodes. We add them after the first holder’s node:
<contentHolders>
 <holder id="1" type="website" x="0" y="0" width="980" height="700" locked="false" depth="10">
 <name><![CDATA[On The Entire Website]]></name>
 </holder>
 <holder id="3" type="website" x="0" y="600" width="980" height="100" locked="false" depth="30">
 <name><![CDATA[Bottom Holder]]></name>
 </holder>
 <holder id="4" type="website" x="0" y="0" width="980" height="700" locked="false" depth="40">
 <name><![CDATA[Top Holder]]></name>
 </holder>
 </contentHolders>
The nodes’ attributes let us specify the holders’ names, dimensions, coordinates and depths. The IDs and the coordinates must conform to the holders’ IDs and coordinates in Flash.
Let’s open the control panel and place the objects to the holders that we have created.
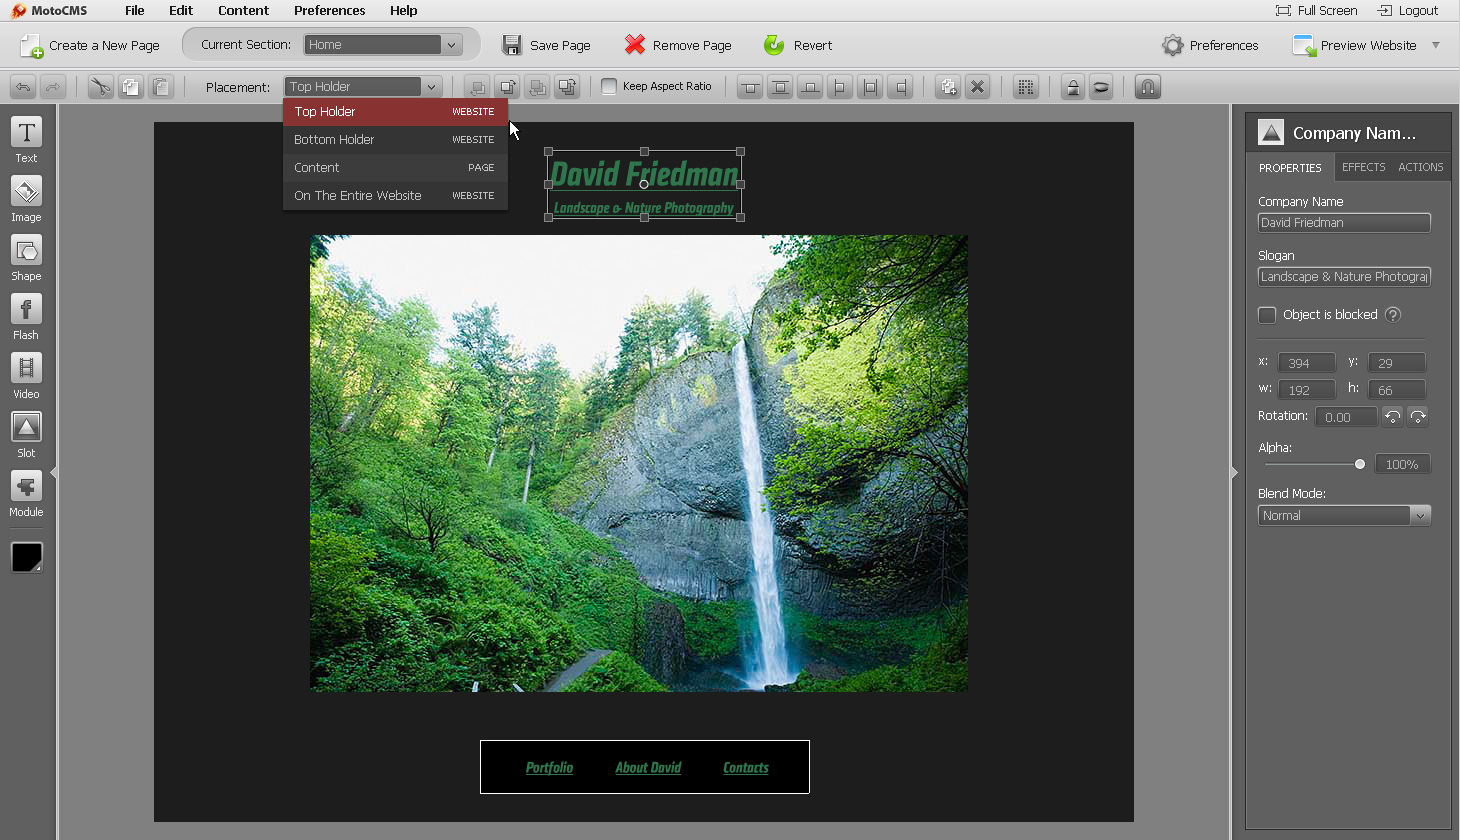
Now we can preview the website and enjoy the animation.

Well guys, we have finished the process of a simple Flash website creation with Moto CMS standalone. You can download the source files and also use them as a step-by-step guide.

Stay with us – we are going to publish many new useful tutorials further.


Leave a Reply