Creating Flash Website with Moto CMS Standalone — Part 3. More Advanced
This is the Part 3 of our series on how to make Flash website with Moto CMS standalone. In the Part 1 and Part 2, you learned about Moto Flash content management system and its main components, passed through the installation process and the process of Moto CMS simple website creation.
Today we are going to talk about content holders, create the “About” page and edit the image preloader for our Moto CMS based website.
Content Holders
Content holders are movie clips that are created in the .fla file. Usually separate content holders are created for the website itself, for the layout, for page content and for pop-up content. We work with the template #1 that has two default content holders already created: a website content holder and a page content holder.
1. To view the default content holders we need to open the website .fla file.
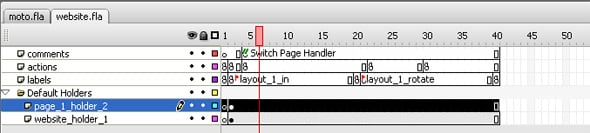
For viewing the code of the content holders created by default please open the structure.xml file (/template_01/xml/structure.xml).
The Website Content Holder:
<contentHolders>
 <holder id="1" type="website" x="0" y="0" width="980" height="800" locked="false" depth="10">
 <name><![CDATA[On The Entire Website]]></name>
 </holder>
</contentHolders>
The Page Content Holder:
<contentHolders>
 <holder id="2" type="page" x="0" y="0" width="980" height="800" locked="false" depth="20">
 <name><![CDATA[Content]]></name>
 </holder>
</contentHolders>
2. Now we may add content to the holders. Since we work with the source template, it already contains the necessary code for the default holders.
We open website .fla file, click on Layer «action» on 2nd frame.
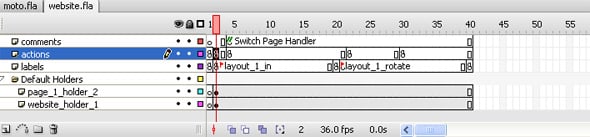
We may add content to the 2nd and 1st holders respectively. Below are the methods that allow us to add content to the holders:
Moto.getInstance().getCurrentPageHolder(2, page_1_holder_2);
Moto.getInstance().getWebsiteHolder(1, website_holder_1);
Website_holder_1 is added on the whole website level, so it is added only once.
Page_1_holder_1 is added on the page level, so when the pages are changed, the holder is cleared (on 22nd frame) and will be added again (on 30th frame).
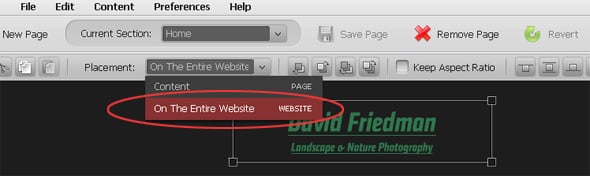
3. Due to the convenient Moto control panel, we can easily make all necessary elements (the background we have created for our website, the title and the bottom menu) to be displayed on each page of our website. For that, we only need to apply the “On The Entire Website” option to each element of the website. Just click on each element and apply the option.
Also, you are welcome to read the detailed instruction on how to create holders in Flash on Moto CMS Forum.
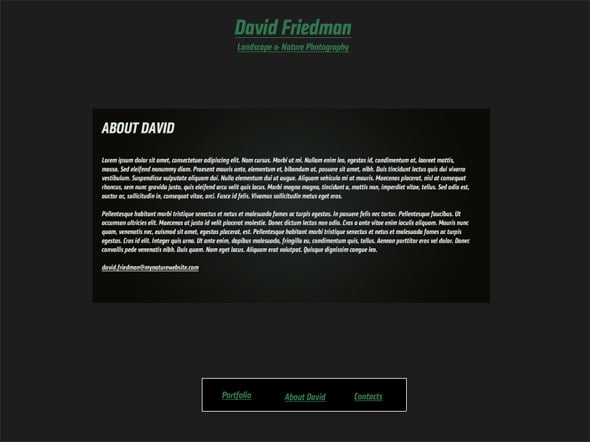
Creating The About Page
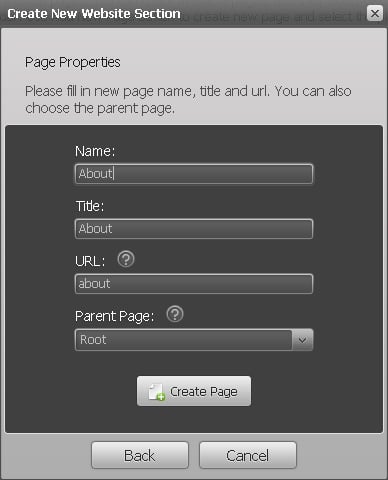
1. On this stage, we need to create an empty page. Go to Content — Pages — Add New Page — Create New Website Section. Fill in the necessary fields and click on the “Create Page” button.
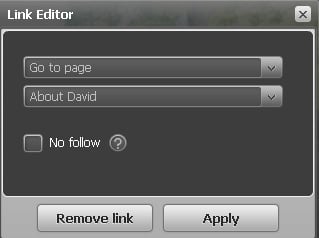
2. Now we need to link the menu button “About David” to the newly created About page. We will go back to the Home Page, highlight the button’s text and open the “Link Editor” by clicking on the appropriate button. Also, we will link the rest of the buttons to the appropriate pages.
3. Now we will add the content plane for our “About” section. We have already uploaded the plane background to the Media Library, so all we have to do is to center it on the page.
Select the “About” page in the “Current Section” within the control panel, and choose the image for the content plane from the Media Library by clicking on the “Image” button on the left vertical toolbar. Center the image.
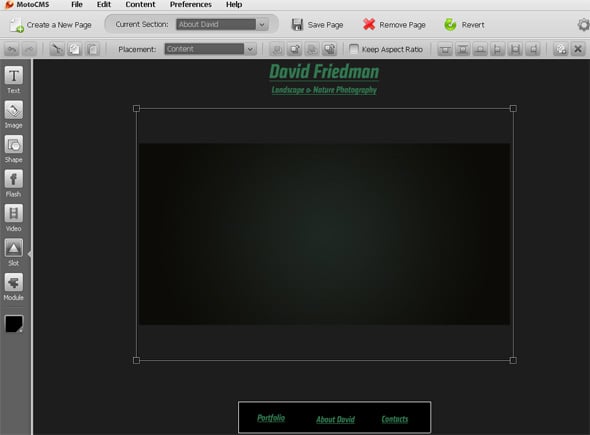
4. Let’s fill our “About” page with content. We will use the Text Tool for that. We are adding the text content for the page and also apply the mail-to function via the Link Tool.
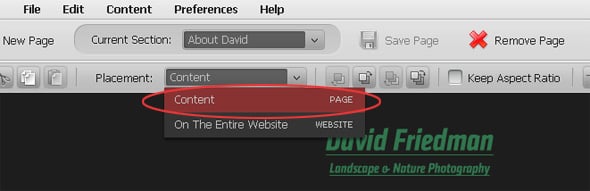
After everything is set within the “About” page, we need to add the content of the page to the page content holder. For that we will highlight each element and in the “Placement” section select “content” from the list.
Editing the Image Preloader
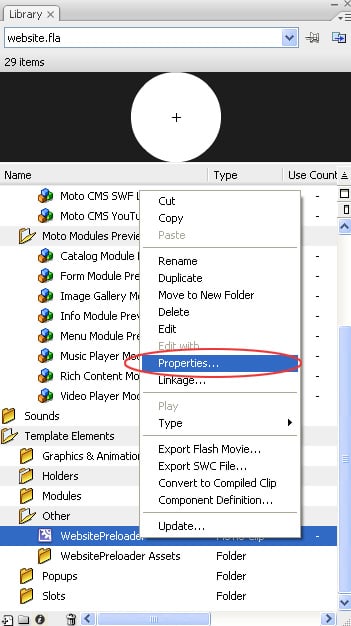
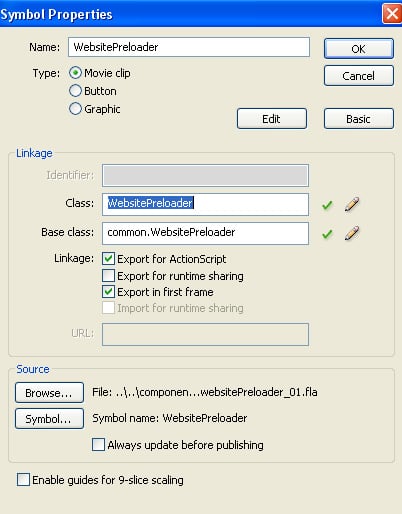
Now it’s time to customize the preloader. For that we will open the website .fla file again and go to the file’s Library. Find the “Other” folder and right click on the WebsitePreloader — Properties.
Within the “Symbol Properties” window, we may specify the preloader settings: type (Movie clip, Button or Graphic), Linkage (edit class definition, edit base class definition — for adding animation to our preloader, etc.), choose the symbol name, etc.
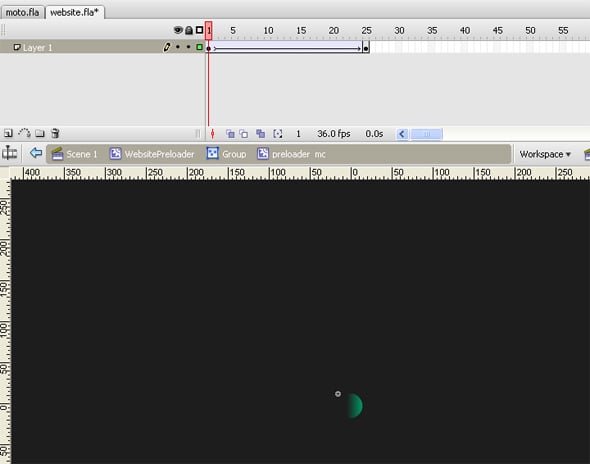
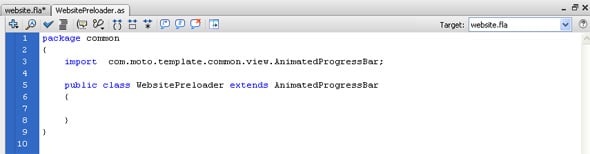
In order to animate the preloader we need to open the WebsitePreloader movie clip and create a simple animation.
Also, we may use the «Edit Base class» function within the «Symbol Properties» window:
Let’s preview the website and look at the changes we have made today:
That’s all for now. In the next part of the tutorial we will create animation for our Moto Flash website.
You are welcome to register a 30 Day Free Trial and start creating your own design with Moto Flash CMS!


[…] 1, Part 2, Part 3, Part […]
[…] read the Part 2, Part 3, Part 4 and Part 5 of the […]