


-
Home

- Website Builder Templates


Best Website Builder Templates from MotoCMS
We are glad to represent you our intuitive website builder and a collection of website builder templates that will transform the whole workflow on your site from an exhausting headache to a seamless pleasure and an efficient result! MotoCMS has ten years of experience in the web design and web development market. As for us, all this time is more than enough to collect specific knowledge of the industry and to implement them into a product that makes modern web page building easy and fast. The website builder with templates we produce are state-of-the-art digital products that aim to help you go online efficiently & fast!
We serve you only with high-end templates that boast superior functionality, and so, become your #1 solution for taking your business to the whole another level. Let’s see what you get when choosing us, among others. Firstly, MotoCMS website design templates mean multi-functionality. When opting for CMS website templates here, you automatically get access to many high-quality web tools that we briefly mention below.
1. Smart Website Builder Templates with High-End Control Panel
The most rewarding of these tools is the site creator with a comfy admin panel that boasts a drag & drop nature. How does it work? Well, imagine that you play with a Lego constructor and add or remove the bricks up to your needs and liking. Here is the same thing, the drag-and-drop editor of our CMS website templates is self-explanatory, i.e., you and only you decide what should be on your site and what definitely shouldn’t. It allows you to work out the layout of chosen website builder templates without any coding or programming skills.
The website builder with templates comes with a control panel that contains a multiplicity of tools, options, and widgets that you can apply to your site by dragging required blocks and adding your content. One more good thing here is a diversity of guidelines and tooltips. They make every step and click clear and reasonable, and so, you do not feel confused and enjoy calm and well-structured workflow.
2. Responsive Website Builder with Templates
When it comes to website building, people from all over the world turn into web surfers with a sharp view and look for solutions that could help them deal with site construction without being broke and stressed. Due to contemporary web world standards, responsiveness is a key to the website’s success. Users from multiple locations search for services and products not only from desktop devices but from tablets, smartphones, and other gadgets as well. Thus, it is worth mentioning that MotoCMS website builder templates are fully equipped to suit your needs in the modern online space.
Each of the CMS website templates we offer either contains a built-in mobile version or is 100% responsive. It broadens your opportunities to capture more new clients and visitors as possible, and so, to promote your business as far as you can. In our extensive product catalog, you will find loads of beautiful, mobile-friendly templates that will look gorgeous and professional from anywhere!
3. Powerful Widgets
Why do users want to create their sites? Well, the answer is easy. Taking into account the statistical data, we can see that the bulk of entrepreneurs and small business owners gain success and recognition only after highlighting their activities with professional-looking sites. So, the conclusion comes by itself, building a web presence is not only essential to survive on the current market but to keep growing and drawing new clients as well.
Thus, CMS website builder templates come with a diversity of up-to-date widgets, modules, options, and tools to help you get the most out of your future sites. Here you will find everything from astonishing media widgets, contact forms, Google Analytics integration to an outstanding Google Map, whatever. Besides, almost every widget has unique design presets that you can use to personalize your very best business website.
4. SEO Tools
Well, if some time ago it was fashionable to hire web studios and freelance developers for this kind of mission, now business newcomers and the seasoned ones want to make sites themselves without spending extra resources. Here the website builder templates come in handy. Thus, applying user-oriented small business website builder is not a trend anymore, it is a must-have that helps people to develop their companies with no effort.
In fact, the only page composer is not enough to succeed on the web. Nowadays, you have to be familiar with SEO to enhance your web page with genuine value and get more customers. That is why all CMS website templates here are equipped with effective search engine optimization options. Therefore, you can easily add meta tags, spice up the images with valuable alt attributes, and perform many other essentials to boost your sites and make them appear on the top of search results. Moreover, using the MotoCMS website builder with templates, you can generate sitemaps & robots.txt files for your sites right in the admin panel!
5. Mixture of CMS Website Templates
Moreover, MotoCMS is all about diversity. It becomes visible when browsing through the categories of our website templates with CMS. The 24/7 technical support is ready to help you enjoy our website builder templates to the fullest. You can reach out to our top consultants to ask any questions at any stage of creating your web pages with our templates. To do so, you might consider starting a chat with our support team, getting a call from us, or just reading a thing or two in our Quick Help tab in the admin panel. Enjoy MotoCMS and welcome the future of the web world!
6. Free Trial Period
Producing the best website builder templates, we believe that every customer should satisfy one's needs to make sure the product fits the business correctly. Thus, we offer you to try any of the CMS website templates in our catalog, and to buy it later, when you are almost done with your web project.
Feel free to get to know with website building templates through a two-week free trial, the number of demo versions you can register is only up to you. Moreover, we store all your edits during the free testing period. So, you can create a mock-up of your website, master your skills, and after that, get a top template with CMS that not only looks niche-perfect but also contains all your changes. However, please note that you will lose all your modifications if you do not purchase the design after the free trial.
7. Hosting Independence
When you choose website builder templates from MotoCMS, you are not pushed to any of the hosting providers. We leave you the space to unwind, so you can pick up the most reliable web host with the plan that fits your requirements and business needs. The only thing that we can advise you is to take a look at the recommended hosting providers that our clients have verified themselves and chosen for their web projects based on our CMS website templates. There you will also explore all the details about hosting requirements that you need to build your site with website creator templates here.
8. Award-Winning 24/7 Support
Our clients know that MotoCMS stands not only for website builder templates of the best quality but also for a satisfaction guarantee. Therefore, our expert support team is ready to assist you at any time. Friendly, polite, and professional support representatives can help you with any questions related to the CMS website templates and even guide you through the whole workflow. Such reliable resources as Trustpilot and Sitejabber contain loads of clients’ reviews about MotoCMS and its outstanding support. You can check them yourself visiting MotoCMS builder reviews.
9. You Are the Only Designer of Your Website
MotoCMS equals uniqueness. If you decide to build a website with a startup web design template from scratch, these website builder templates should be your #1 choice. You buy not just a ready-made theme, but the design you can personalize yourself. For starters, you are empowered to get as creative as you want with the layout. It is achieved thanks to the drag-and-drop website builder admin panel we have already mentioned. What is more, only you decide what design your site needs. It means that even if you buy the most popular website creator templates from MotoCMS, you know you can make them personal. You can build a unique website on your own, and with the flawless templates, it will look and function like no other.
Types of Website Builder Templates
The thing is that we support multiple business directions and help small and large business owners, as well as newcomer entrepreneurs, build different types of web pages. The only thing that is the same for all types and categories of our CMS website templates is first-class quality. We offer you to choose from current four types of our products:
- MotoCMS 3;
- Ecommerce;
- MotoCMS HTML;
- Landing pages.
All types of website builder templates get updated regularly, so, you can make even more beautiful websites with pleasure.
Ecommerce Templates
Each product type is specific and has handy features that allow you to succeed with your projects online. For example, our website builder templates for online stores boast diverse options for optimizing your products and highlighting them with proper descriptions, implementing various payment gateways, filtering the items you sell, applying them for comparison, and much more!
All eCommerce templates powered by MotoCMS are responsive, cross-browser compatible, and feature-rich, which makes them perfect for launching eye-grabbing online shops of any complexity!
MotoCMS 3 Website Builder Templates
Our CMS website templates named as Moto CMS 3 templates are your complete solutions for building sites filled with the latest industry trends and features. If you visit the release notes page, you will see that we add plenty of new widgets and integrations regularly.
For example, thanks to a new Appointment by Acuity Scheduling widget, you can book appointments and schedule meetings directly on your site. Whether you created your website for a dentistry, beauty salon, law firm, or any other business that needs consultations and appointments, this widget comes in handy. It was only one example, feel free to read many other updates on the page mentioned above.
HTML Templates
MotoCMS website builder templates of type HTML templates are perfect for those who prefer classic in web page building. They boast unusual design and top-notch functionality, and so ensure pleasant user experience. With these designs, you can launch custom web pages effortlessly!
Landing Page Templates
Meanwhile, MotoCMS landing page templates will help you to create appealing one-page websites for self-presentation, a brief showcase of your company with call-to-action, and even for showing up hot deals and offers related to the world’s most famous and in-demand sales. For example, browse a Black Friday landing page template.
Diverse Categories of Website Builder Templates
All CMS website templates in this comprehensive catalog allow you to create excellent websites for a variety of aims, goals, and businesses. So, you could spice up the project from almost any niche with an alluring site that brings value. In a nutshell, we will represent you the most favored directions of our website creator templates below.
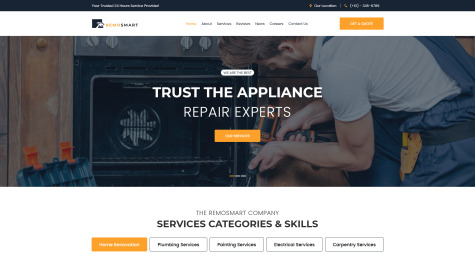
- Business niche with finances, law, consulting, startups, and more;
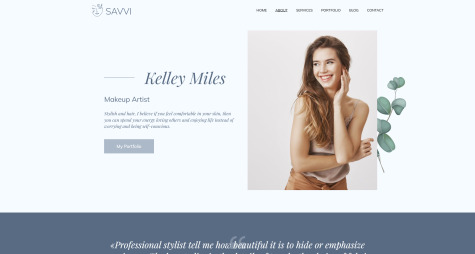
- Beauty industry with different salons, cosmetics & perfumes shops, makeup artists, tattoo & piercing art, whatever;
- Photography with designs for personal photo galleries, photographer portfolios, lookbooks, model agencies, and much more;
- Real estate industry with designs for realtors, homeowners, renting, home inspections, etc.;
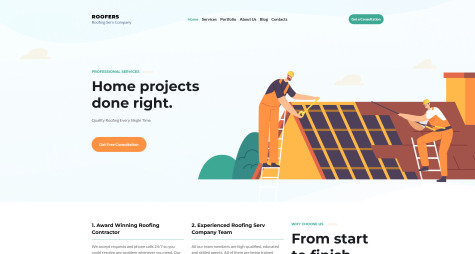
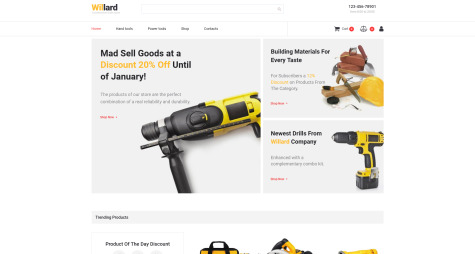
- Industrial designs for steel, oil & gas, road construction, marine, and other companies;
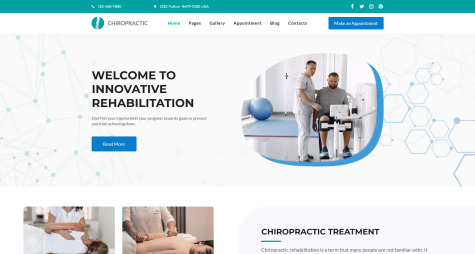
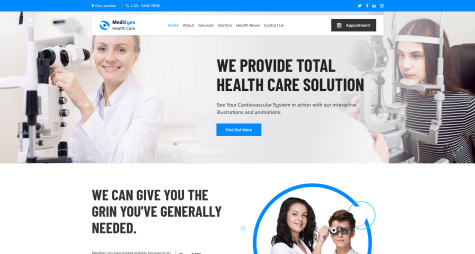
- Medical niche for dentists, surgery, therapists, psychologists, nutritionists, clinics, laboratories, and more;
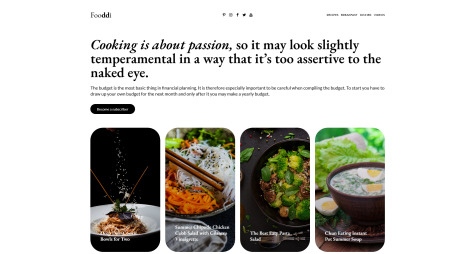
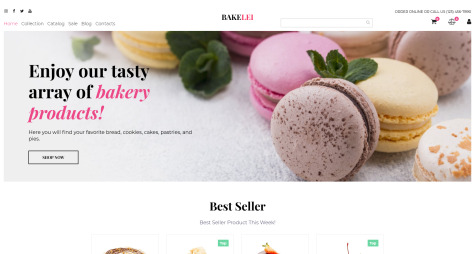
- Restaurant and food industry for cafes, bars, gourmet restaurants as well as for food delivery, grocery shops, liquor stores, etc.;
- The niche of sport, related to golf, basketball, soccer, diverse extreme sports, sport clubs, and more;
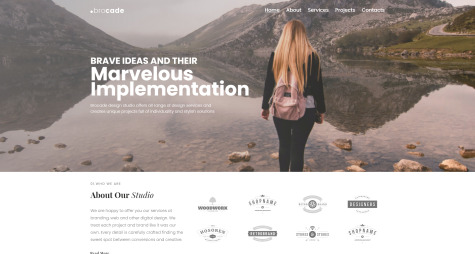
- Web design, development, marketing industries for experienced professionals and newbies and their personal profiles, SEO agencies, marketing companies, freelancers, etc.
Custom Picks
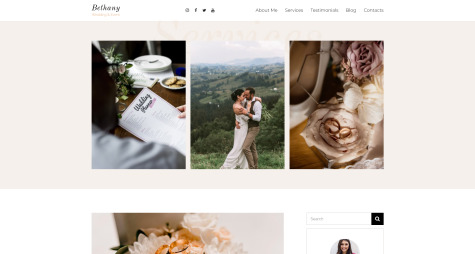
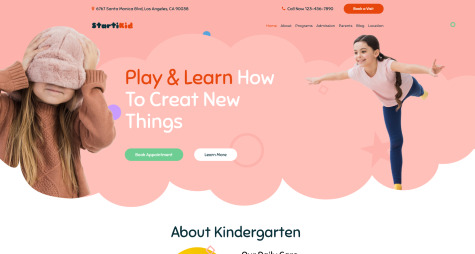
As you can see, these website builder templates with CMS cover various niches, so you have a broad choice for your type of business. Moreover, there are many other in-detail categories where you will find CMS website templates for education, wedding, interior & exterior design, music, home & family cars, charity, and for many other kinds of activities and projects.
Additionally, there are also specific categories that allow you to pick bestsellers, new, top-rated designs, premium templates with unique designs or even templates with zero downloads to be the first. Take a look at these particular, tailored collections below.
- New website design from MotoCMS.
- Best selling website templates on MotoCMS web builder.
- Top-rated designs powered by MotoCMS.
- Premium website templates on MotoCMS web creator.
- Unique web templates with zero downloads.
MotoCMS Website Builder Templates - Special Services
We provide not only complete CMS website templates for your web projects but also are ready to help you with all the ins and outs concerning your future sites. When opting for our web templates, you can even get extra customer services that will help you to optimize your site from every angle to turn the whole website building and maintaining process into the piece of cake.
Template Installation and Customization
Basically, these are two separate services that you can purchase together with favorable website builder templates of your choice. The service line is convenient for those who can’t install and edit the chosen design or have no time to cope with the task without third-party help. All we need to proceed with your template installation is hosting details. We will provide you with a fully-installed site within three hours.
Regarding the template customization service, it is helpful just because industry professionals help you to get the most out of the selected web design. We will install the theme for you, work on your site’s color scheme, place your logo design correctly, and also will refine the placement of your content. Both services, in addition to website builder templates, help you save time and resources on web development. You get expert assistance and the best possible outcome!
Web Copywriting Services
When you are going to highlight your business with responsive website builder templates, you definitely should think about creating unique content. It comes as no surprise that poor content on your site will make it fail even if it boasts an appealing design and functionality.
Thus, we offer you professional copywriting services that include niche-specific, original content creation, keyword optimization, existing copy editing, social media texts, and even more. Choose the plan that fits your needs the most, receive a call or an email, provide us with your requirements, get your content done in 3-5 business days, ask for revisions if necessary, and publish it on your site!
On-Page SEO Optimization and SEO Audit
These two compelling services that you can add on-cart with our website builder templates will help you to adjust your site to appear on the top of search results. How can we ensure this? Well, our SEO specialists know their business, and so, have an in-depth knowledge of search engine optimization.
On-page optimization service includes a comprehensive analysis of your site’s organic performance, keyword mapping, competitive strategy planning, PageSpeed boost, and many other essentials that come as a must for a strong online presence. SEO audit service, in addition to website builder templates, stands for a global analyzing the content on your page. You will get up-to-date recommendations and will quickly apply them on your site through the admin panel thanks to handy guidelines.
PageSpeed Booster
Even if you have a beautiful website layout, its everlasting loading makes you fail. Often business owners use too many media that slows down their sites. But no one wants to wait for too long, especially if we are in a hurry to search for some services or products. That is why page loading speed is crucial for your online business success.
MotoCMS with its website builder templates also offers you a complete PageSpeed Boost service that will refine the load speed of your site. Our professionals will compress all the images and will do other necessities to bring you a web page with improved UX and speed. You will surely love the results!
Logo Creation Services
No doubts, a professional-looking logo is a key to your business success just because it makes it memorable and lures your clients. MotoCMS with its website builder templates and a top-quality CMS website builder offers you a collection of premium and free logo templates that you can quickly implement to your businesses.
Moreover, if you need a custom logo, our talented designers will do their best to serve you with a creative logo design and beautiful typography in less than ten business days.
Google Ads
If you would like to take advantage of Google Ads but have no idea on how to get started, MotoCMS with its website builder templates is at your disposal. We offer you a comprehensive pack which covers everything starting from hassle-free account creation, expert keyword research, custom audience creation to search campaign launch and its free 7-day management.
Our professionals are ready to help you promote your business. Provide us with business details and info on the available campaign budget, and have efficient advertising that will bring you tons of new clients.
MailChimp Email Campaign
Email marketing is a thing that helps you to gain new clients and stick the existing ones. Thus, our marketing experts suggest a valuable email campaign creation through the MailChimp email service. We will help you to segment the audience, create a useful email content with niche-perfect design, and launch the campaign professionally. We will also provide you with the final report on your campaign after its launch.
Additionally, we offer you template installation and customization services, GDPR compliance audit, social media pack, custom hourly development service, and more. With website builder templates, you can even get a white label to retail our ready-made designs under your brand. You are very welcome to check the entire assortment of available services on-cart.
Create Your Website with MotoCMS Website Builder Templates
For sure, building your site with CMS website templates from our catalog is simple, enjoyable, and fast. We prepared for you brief guidance on how to go online with your project using our CMS website builder.
- Pick the design. Take a look at the full collection of website building templates, their categories and types, and pick the one that you like the most.
- Choose the blocks up to your liking. Pick necessary blocks and move them where you need using the drag & drop principle;
- Customize everything you need. Feel free to edit text styles, colors, images, and other essentials;
- Apply your content and publish. Enrich your site pages with personal content, optimize it, and go live with a professional, responsive, user-friendly website effortlessly!
Go Online with MotoCMS Website Builder Templates
As you can see, there is a vibrant variety of CMS website templates based on MotoCMS. Choose the one that appeals to you and start creating your site right here and right now! Website building templates are your number one tool for a successful online presence!