Moto CMS Image Editor: Looking Inside
If you are a Moto CMS website owner, of course, you already had time to appreciate the high functionality and convenience of Moto CMS Image Editor, which has been specially created by Moto CMS developers to simplify your work with images within your Flash CMS website. And for all those, who only plan so far to join our big Moto CMS family, we decided to demonstrate the wide opportunities of this great tool.
With Moto Flash CMS based website you don’t need to edit your images before uploading them into the Media Library. Due to the advanced Image Editor powered up by Moto CMS, you can modify your photos right within the control panel. It allows to perform the plenty of editing functions, from simple to complex.
So, we invite you to pass through the process of editing an image within the control panel step by step.
Let’s play with an image and try all the Image Editor options:
Open the Media Library from the Preferences section and select the image you are going to edit. You can do it either by double clicking on the image or with the help of the “View/Edit Item” button below the image.
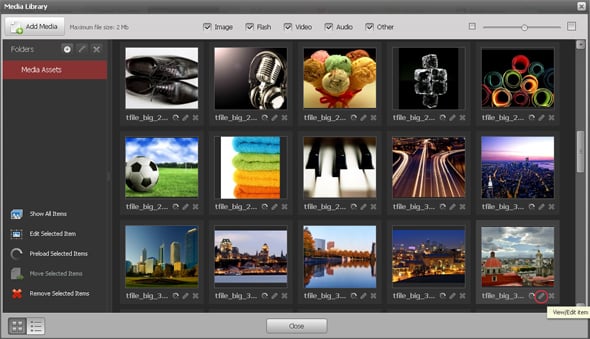
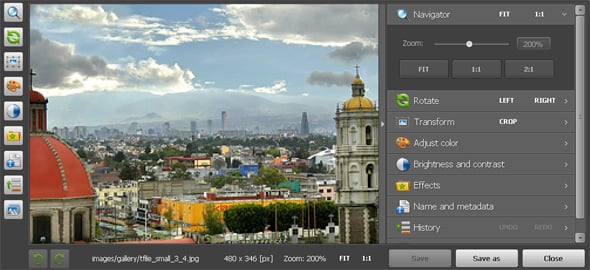
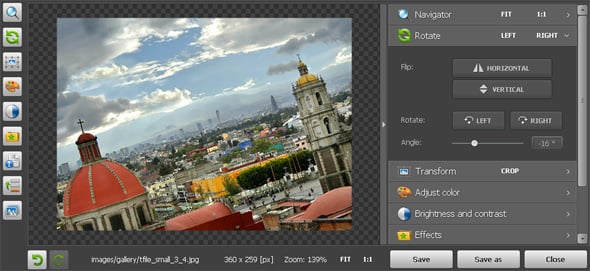
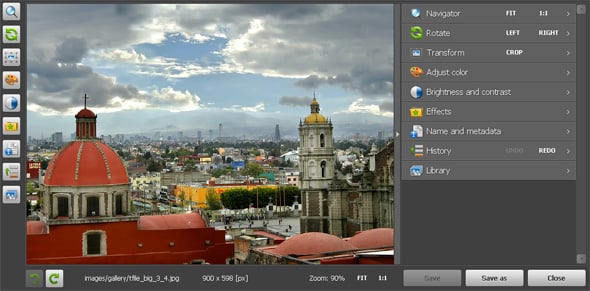
The Image Editor will open:
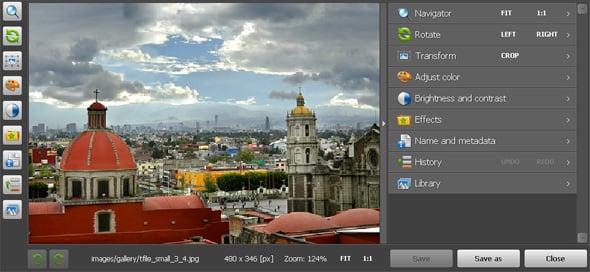
The right control panel of the Image Editor offers the set of options and tools for the advanced, effective and fast image editing. By means of the left toolbar you can quickly access the Image Editor’s functions.
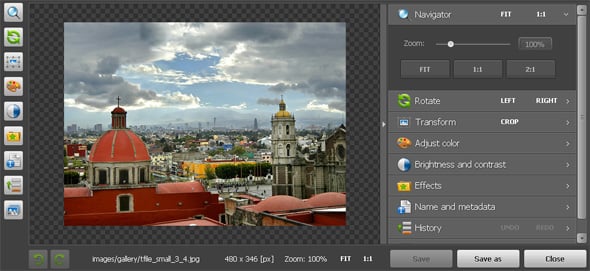
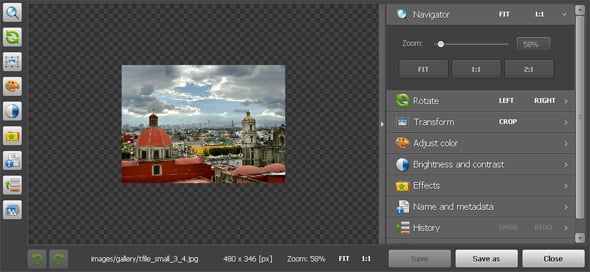
1. In order to scale our image, we will use Navigator. We may zoom the image in and out from 20% to 400% by dragging the slider. By means of the “FIT”, “1:1” and “1:2” buttons we can make the image to fit to the window size, to use its original size or to zoom it in 2:1.
Due to the option “Save As” we can save the edited photo as a new image.
FIT:
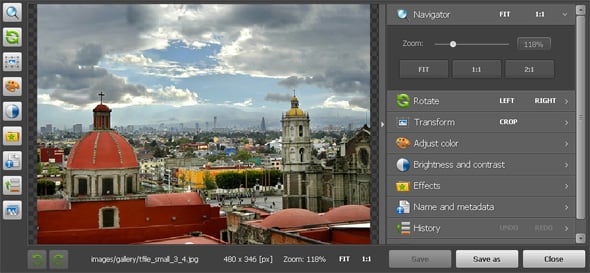
1:1:
2:1:
Zooming out to percent:
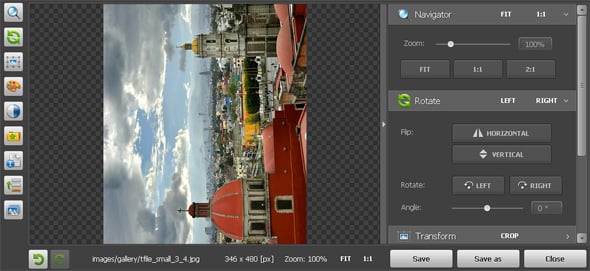
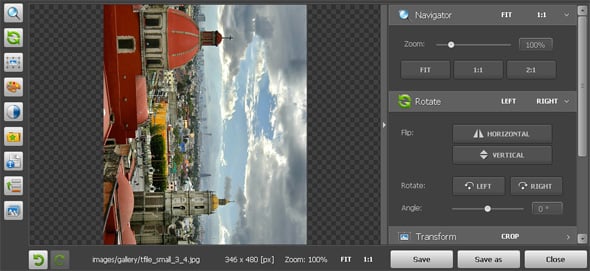
2. We can flip the image horizontally or vertically, rotate it left or right as well as choose the angle of the image view by means of the Rotate options.
Horizontal flipping:

Vertical flipping:

Rotate left:
Rotate right:
Choosing the angle:
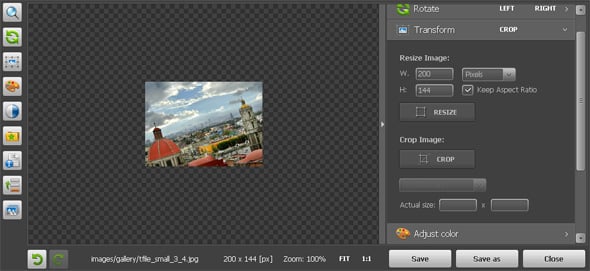
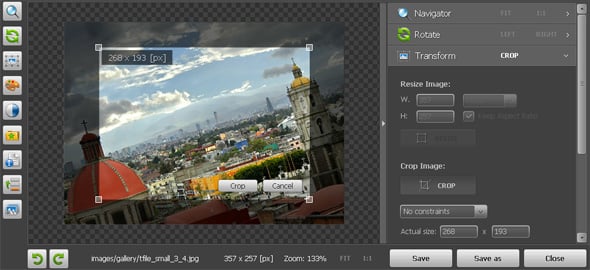
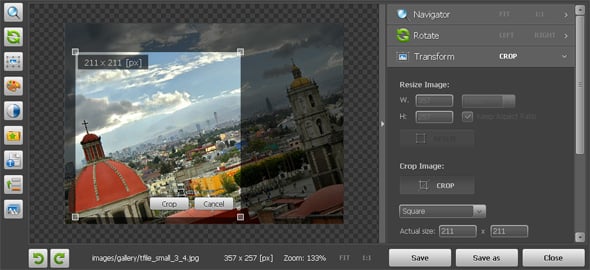
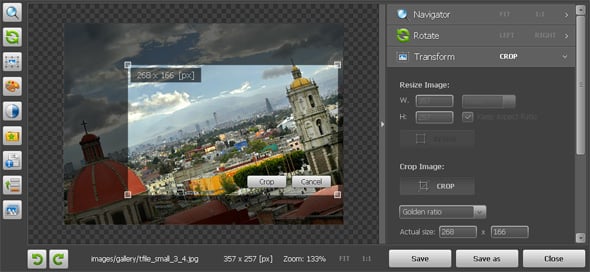
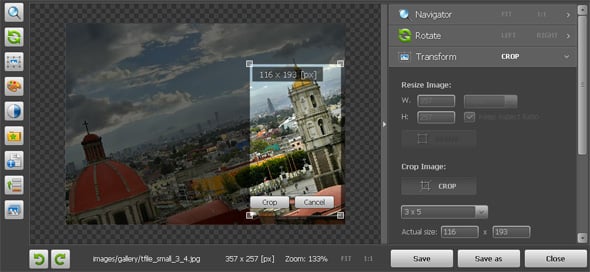
3. We can resize our image by means of the Transform options: resize it in pixels or set percentage ratio, crop the image (with no constraints, by setting the parameters from the dropdown list or by setting the necessary image size in the “Actual Size” boxes. In the process of resizing the image for cropping, the actual size parameters also change, so we can always check the actual width and height of the image before cropping it.
The Image Editor functionality allows to work with the images of any size, even if its size is more than 2800px. So, you can upload the images directly to the Media Library from your digital camera and then edit them right within the control panel.
Resizing by setting the parameters:
Cropping with no constraints:
Square constraint cropping:
Golden Ratio constraint cropping:
3 x 5 constraint cropping:
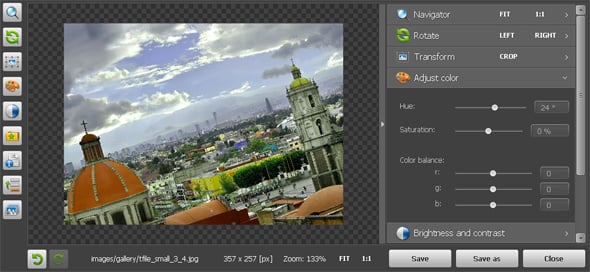
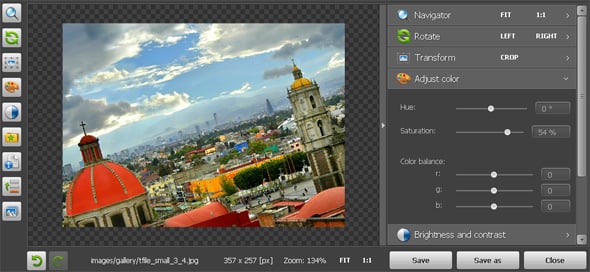
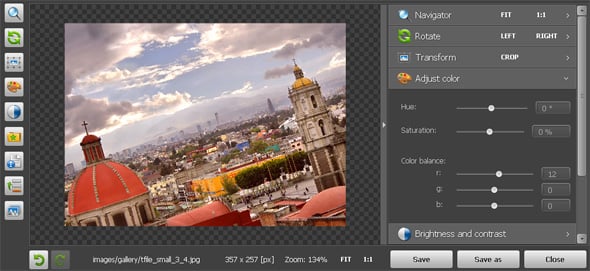
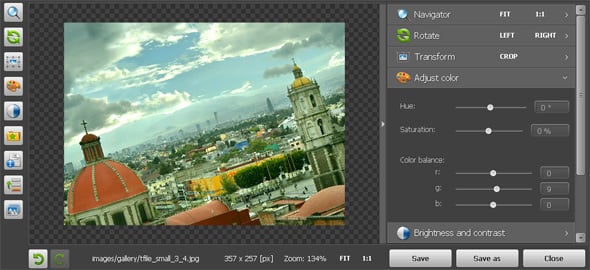
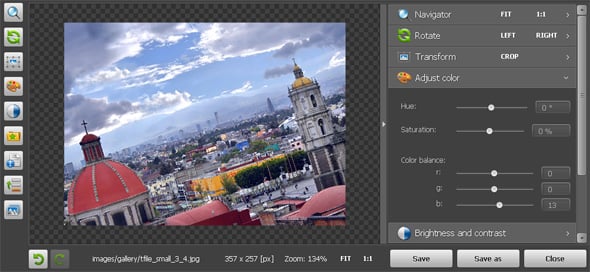
4. We can Adjust Colors: change the image Hue and Saturation, and also balance colors for the image and see the percentage of the changes right in the process of dragging the option’s slider.
Adjust Hue:
Adjust Saturation:
Color Balance: adding red:
Color Balance: adding green:
Color Balance_adding blue:
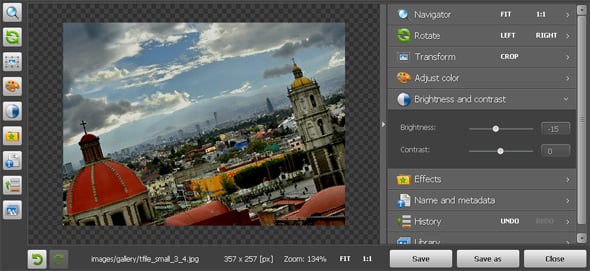
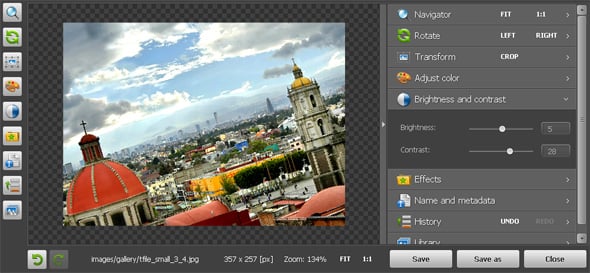
5. We can add brightness and set the image contrast means of the Brightness and Contrast options.
Adding brightness:
Adding contrast:
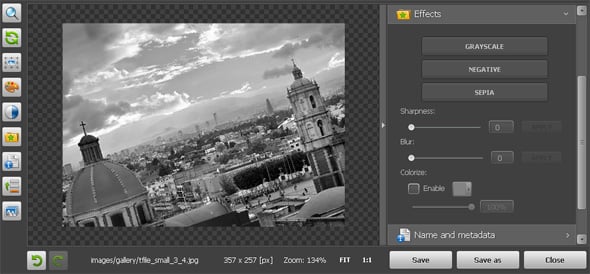
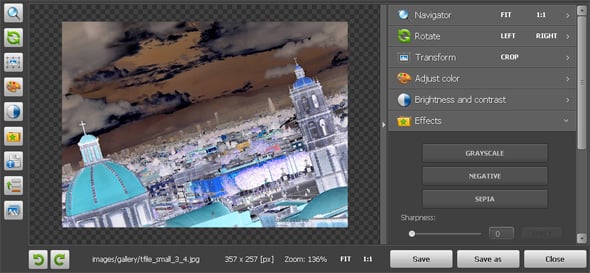
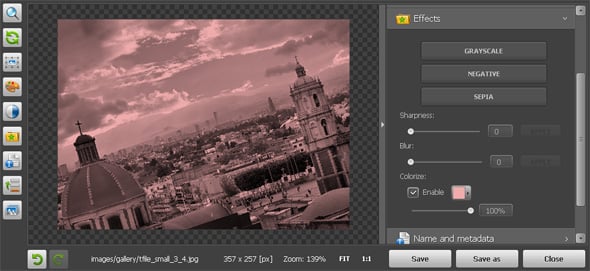
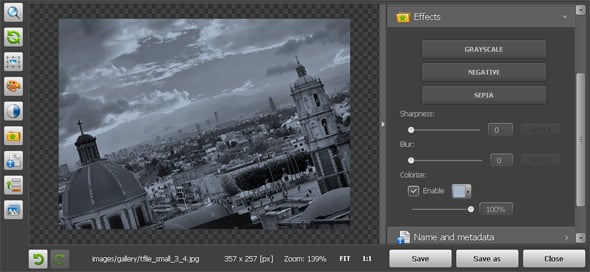
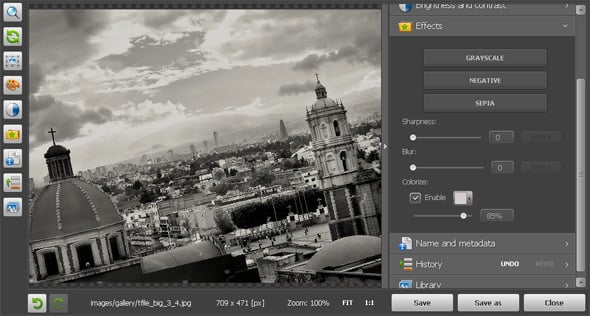
6. Now let’s add Effects to our image. We can make it grayscale, negative or sepia and add some sharpness and blur. If we enable the “Colorize” option, we will be able to colorize the image by means of the Color Picker. Also, we can set the percentage of the colorization.
Grayscale:
Negative:
Sepia:

Colorization:

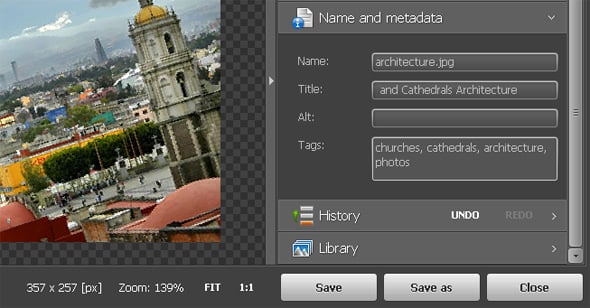
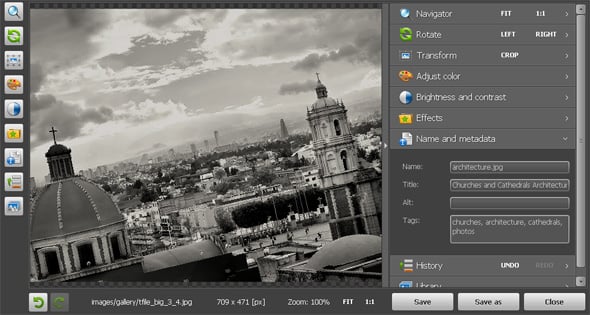
7. Of course, you know that optimizing images is a very important task for search engine optimization. Let’s specify the Name and Metadata details for the image for better SEO ranking: change the file name to more informative one, add a descriptive title, alt and tags.
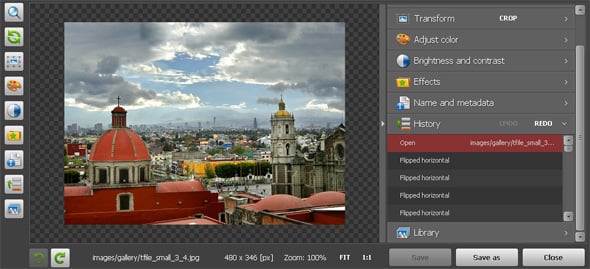
8. If we need to go back or forward to any step of the image editing, we can easily do it – all the steps of the image editing have been saved in the History section of the Image Editor. We just need to choose the item to restore the image to selected state. The “Undo” and “Redo” functions are also available.
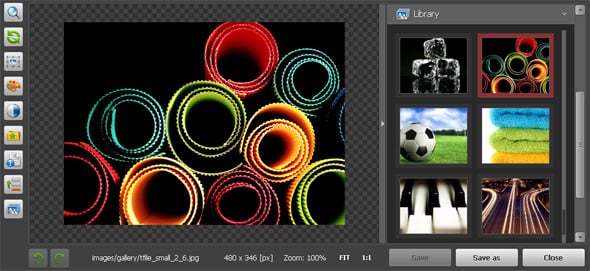
9. For the quick access to our images there is the Library section. It is possible to organize images (as well as other files) into folders in Media Library. Due to this convenient Media Library option, it is possible to shorten the number of loading elements in the main Media Library window as well as speed up the process of the file search.
The Moto CMS developers work non-stop in order to make the product more advanced and feature rich. Stay with us – we are going to amaze you very often!
Your opinion is very important for us. Please leave your feedback and offers regarding the functionality of the Image Editor as well as your ideas as for new features and options on Moto CMS Forum in the Feature Requests section.
Choose one of the premium Flash CMS Templates and register a 30 day FREE DEMO to try the Image Editor in action.


Leave a Reply