

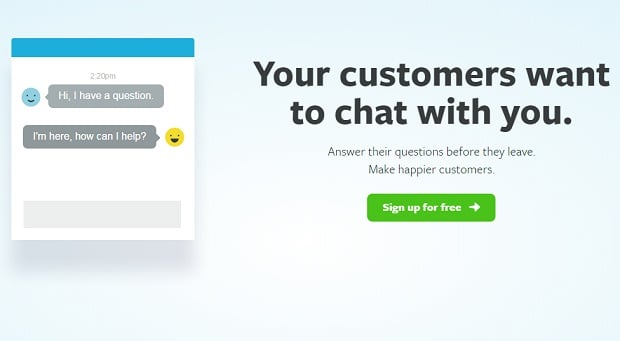
Business and commercial website owners must offer professional customer support to give a proper advice to a client when it is necessary. Live chat is the key solution to make your customer support more effective.


With an integrated chat widget a visitor don’t have to wait for an operator for hours. No more frustrating phone calls or annoying emails. The customer’s problem will take only a few minutes to solve due to a program of instant messaging. It has never been easier and faster to ask for a help or issue solving without having to speak to a service manager face to face. This tiny window will turn the tedious process of questioning into comfortable and quick professional consultancy.
Another significant reason to add a chat widget to your website is the real-time feedback about your company or brand. Live chat allows getting client’s opinion about one or another issue concerning your services or products. Knowing the needs of your website audience leads to profits increase and customer base growing.
There is a wide range of companies that provide live chat wigdets. MotoCMS 3 templates work perfectly with three of the most popular ones: Olark, Tawk and Zopim. Now check out how to install any of these live chat widgets to your website step-by-step.
Adding Olark Chat Widget
1. Sign up to Olark first. It will cost you nothing.

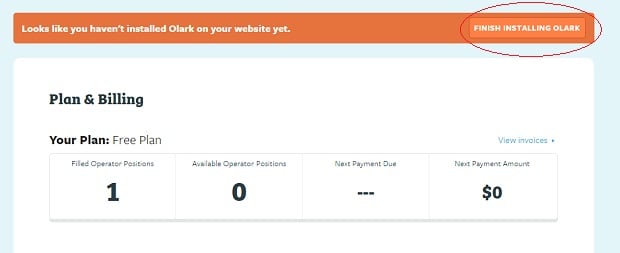
2. After email confirmation choose your plan and click on “Finish installing Olark” button.

3. Copy the embed code of your Olark chat.


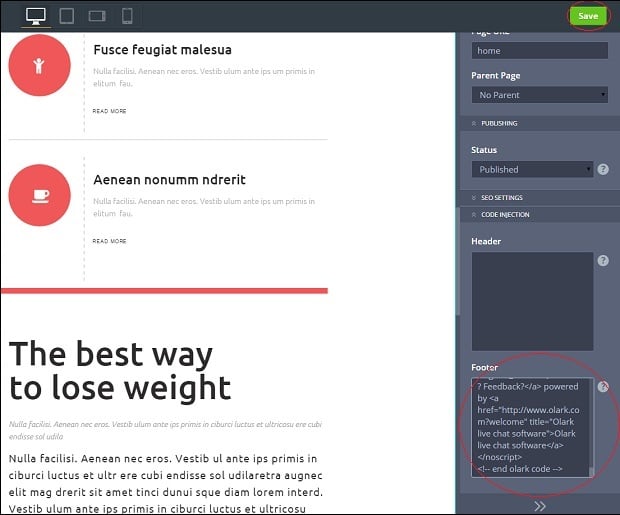
4. Open the admin of your MotoCMS template. Choose a page that is suitable for chat. Find the “Code Injection” tab. Paste the given code into “Header” or “Footer” text field. Click “Save” button.

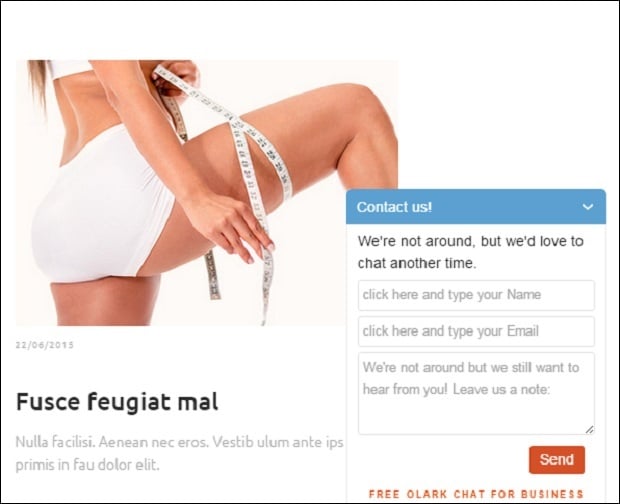
5. Your live chat provided by Olark is ready to work.

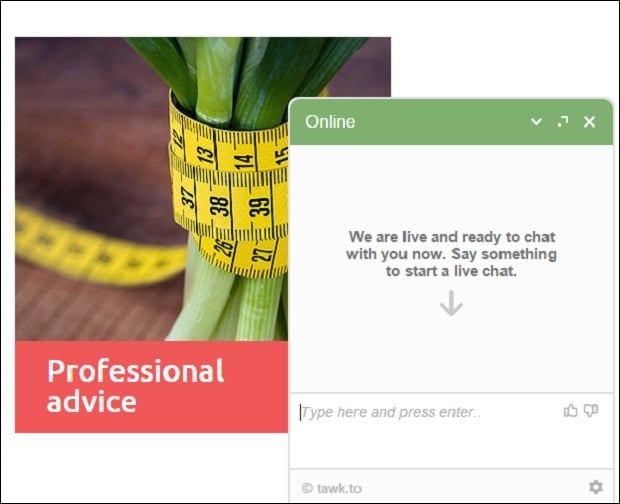
Adding Tawk Widget to the Website
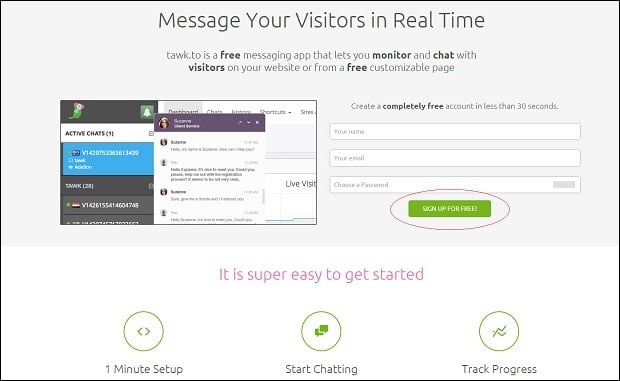
1. Sign up for Tawk for free.

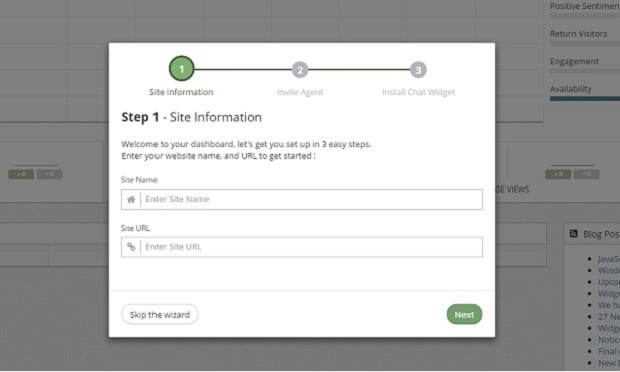
2. Fill in information about your website.

3. You are welcome to invite another person to control your website chat. Skip this step, if you don’t want anyone else to control the chat.


4. Copy the text code.
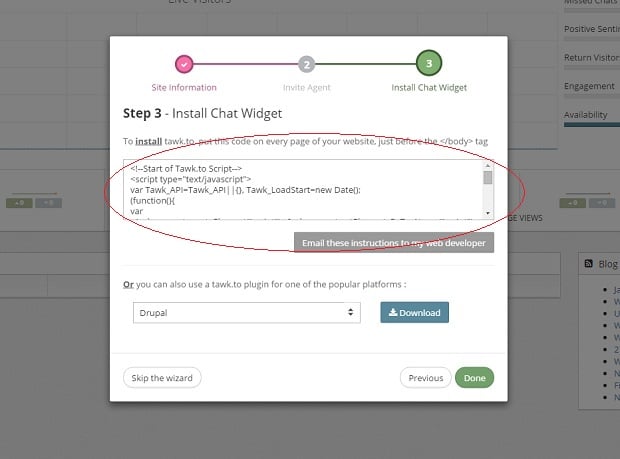

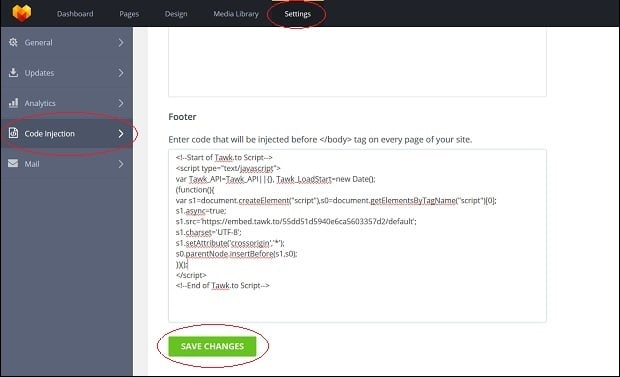
5. This step is similar to the one during Olark chat installation. Just embed the code into a Header or Footer section. However, if you wish to install Tawk live chat that will be shown around the whole website, you need to perform a bit different actions.
Go to “Settings” in the MotoCMS control panel. Click on “Code Injection” section. Paste the text code and save the changes. Thus, the chat window will appear on any page of your website

6. Enjoy the widget developed by Tawk.
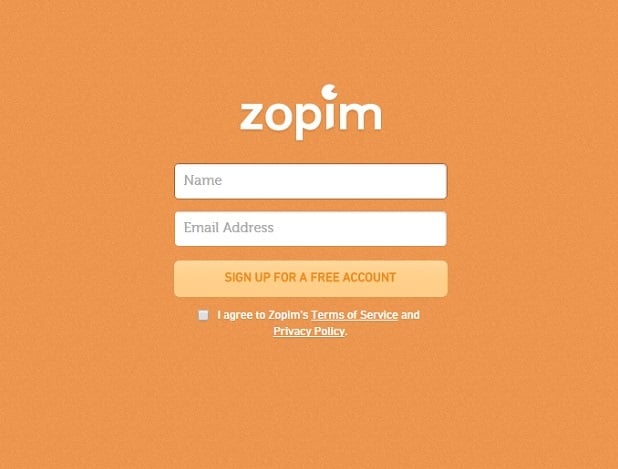
Adding Chat Widget from Zopim
1. Sign up for a free Zopim account.

2. Add your contact information.
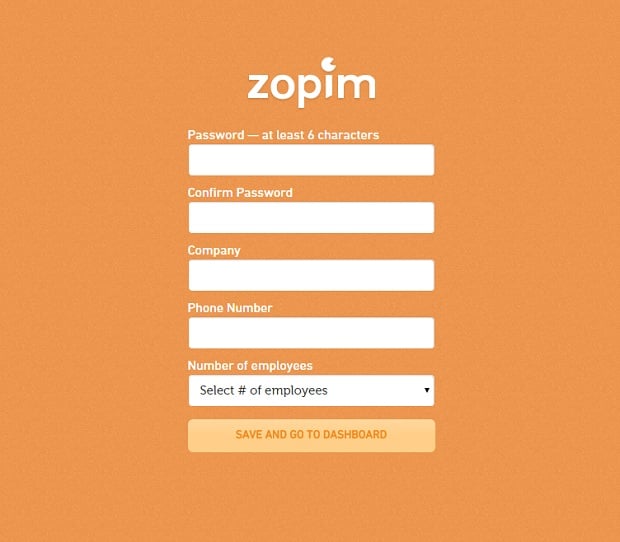

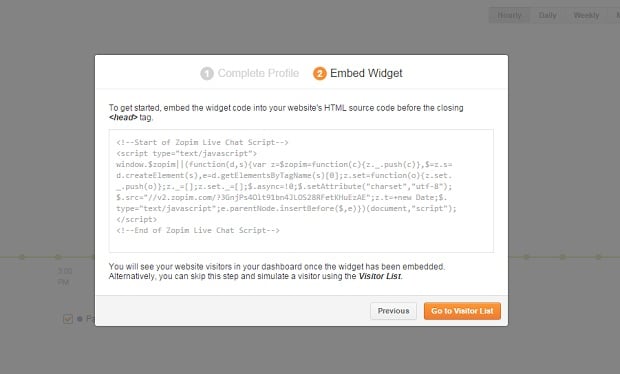
3. Complete your profile and copy the code to embed the widget.

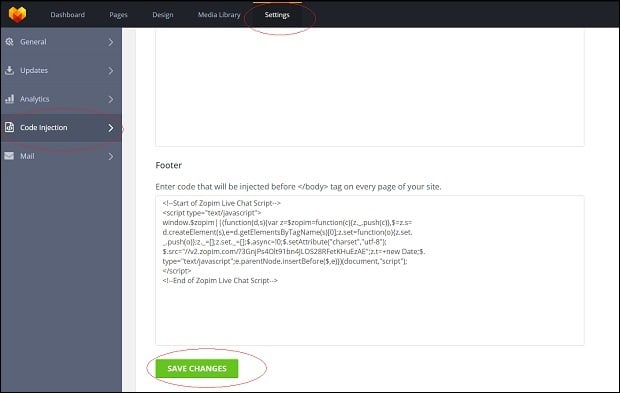
4. Open the control panel of MotoCMS 3 template. Click on “Settings” section. Choose “Code Injection” tab. Paste your code into it. Save changes.

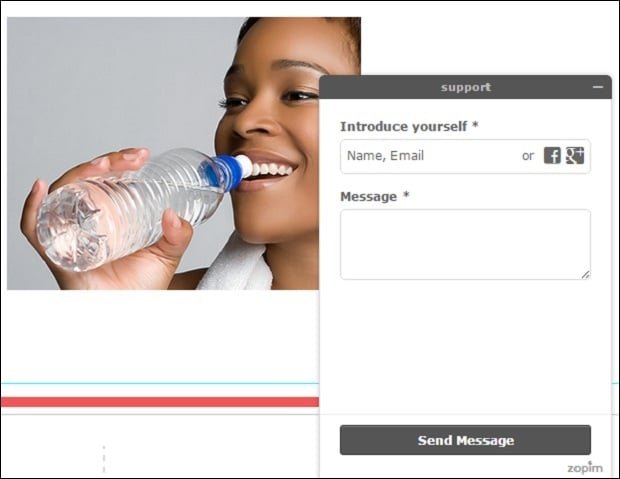
5. Here comes ready-made live chat by Zopim
Now you know that chat installation process takes only a few minutes. You don’t have to be a skilled programmer to embed live chat to your MotoCMS 3 template. Try to do this yourself, choosing a chat provider that will be perfect for you. Concider adding chat if you would like to grow your website community. It is the perfect option for better user understanding.
