

Hi guys,
The Facebook layouts that have been launched recently and enriched our collection, aroused a great interest among many Facebook fans, web designers and developers. The reason of Facebook Flash templates popularity is their flexibility and really attractive look. Due to the advanced Moto Flash CMS integrated into each template, it couldn’t be any easier to create an impressive, unique and highly functional Facebook Fan Page for your photo/web design studio or another business web project. Today we would like to show you how to create a catchy and highly functional Facebook Fan Page.
We invite you to pass through the process of editing one of Flash CMS templates for Facebook from our Flash templates collection and evaluate the widest opportunities the Facebook layouts based on Moto Flash CMS open for their users.
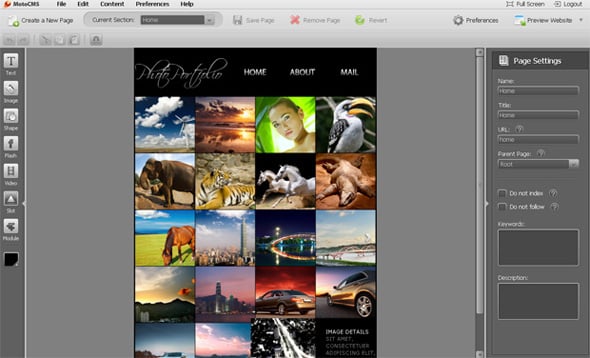
For our experiment, we have chosen the Flash Facebook template #33109. Let’s start creating a website for Facebook photo portfolio…


Go to http://yourwebsite.com/admin/ to get access to the control panel (if you get the access for the first time, you will be asked to activate it).
Please activate your product on http://accounts.cms-guide.com/ (Your account details will be sent to your e-mail after you have purchased Moto CMS) and refresh your browser page.
Open the Facebook Flash template control panel:
1. You may easily edit the template via Wizard (File — Wizard) in the control panel. With its help you may easily modify the template and create your own Flash website for Facebook.

The Wizard helps you to edit the website structure and its content, create new pages and pop-ups as well as change the website and control panel settings.
2. Changing the title. The title can easily be changed by means of the Logo Slot: activate the “Show All Objects” function via the upper tools panel, and use Text Editor via the “Label” in the slot properties:
![]()
3. Editing Photo Gallery Content. You may easily upload your own photos to the gallery. For that you should edit the Image Gallery module. Double click on the gallery within the control panel, remove the current images from the gallery and add the new ones by clicking on the “Add Media” button.

Due to Moto Image Editor functionality, you may upload images of any size (even more than 2800 px) directly to the Media Library and then edit it right within the control panel. Within the Image Editor, you may zoom an image, rotate, re-size and crop it, adjust colors, add visual effects (like grayscale, negative, sepia, etc., add sharpness, blur, and also colorize it), specify the name and metadata, etc.
Double click on the image in order to open the Image Editor.

When adding a group of files, you will be able to set the parameters for the whole group.

Here you may specify the following settings:
- Choose the size of the added images (if necessary). When changing the size, you may set the image’s width and height or use the «Scaling mode» function;
- Place the added images in a separate folder;
- Link the images to an internal or external page or a pop-up.
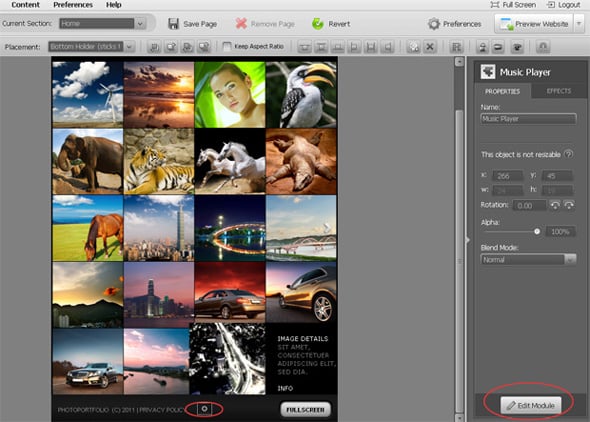
4. Each Flash template powered by MotoCMS contains the Music Player module. You may edit the module by double clicking on the equalizer icon or by clicking on the “Edit Module” button on the module’s control panel:
You may add as many music files as you wish by clicking on the “Add” button.
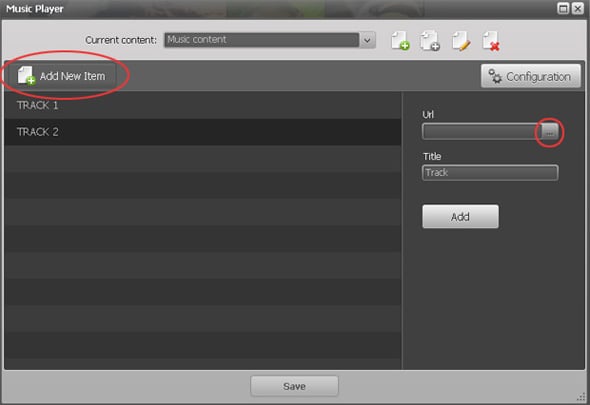
Open Media Library by clicking on the ‘URL” button and add the necessary music files by means of the “Add Media” button. Before adding the music files, upload them to the media library in the same way as you uploaded images.
After you uploaded the music files, you may specify the music player settings for the chosen music tracks.
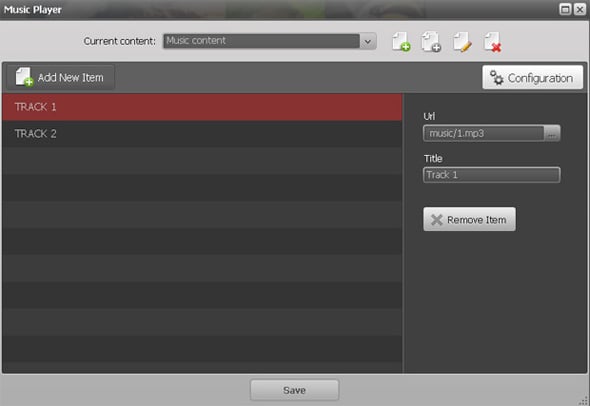
You may edit the following settings for the added tracks within the Music Player:
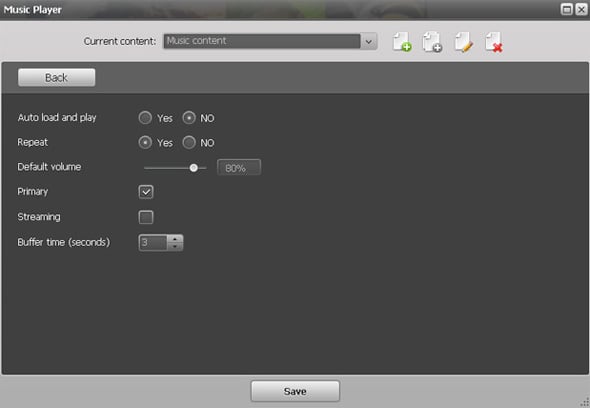
You may set the following parameters for each sound track:
- Auto load and play. If you select «Yes», the music will sound automatically, after the visitor opens the splash page;
- Activate the “Repeat” function;
- Set the volume parameters by dragging the slider of the “Default Volume” option;
- Activate the “Primary” option for the sound track;
- Set the Buffer Time (in seconds); “buffering” means that the player starts tracking before the file download is complete.
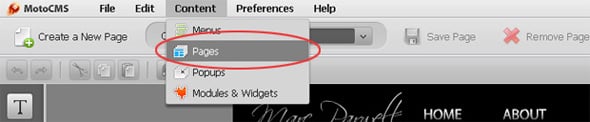
5. Now let’s edit other pages of the Facebook Flash CMS template. Select the page you are going to edit: Content — Website Pages:
Don’t forget to save changes!
Here you can make the following modifications:
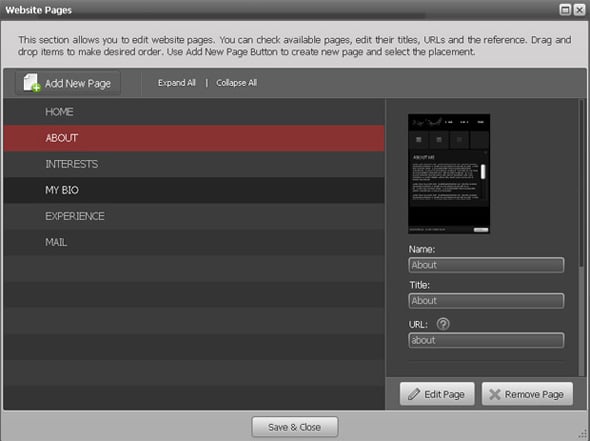
- Add and remove pages;
- Specify a name, title and URL for each page;
- Change the template structure by placing the pages in the order you need them to be placed;
We decided to make a photo album consisting of a few pages. So, we will leave the home page with the image gallery, the “About” and “Mail” (Contact Me) pages. As for the rest of the pages, we’ll delete them.

6. Now let’s fill the pages with the necessary info. Select the page you are going to edit from the “Current Section” list. You may edit the text and title via the Rich Content Block module.
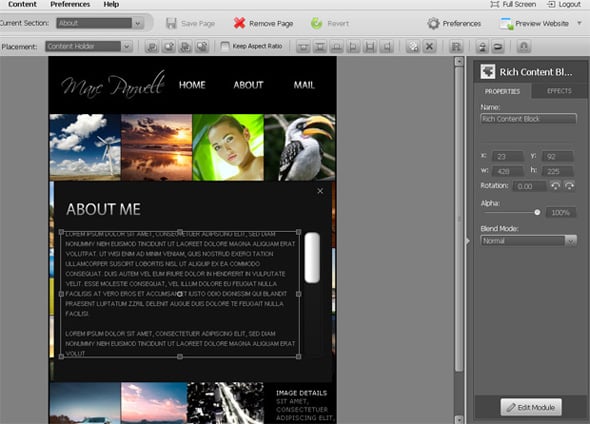
You can manage the module settings by clicking on the “Edit Module” button. In the “Module Settings” section you can set the block width and height, choose background color as well as adjust content position.
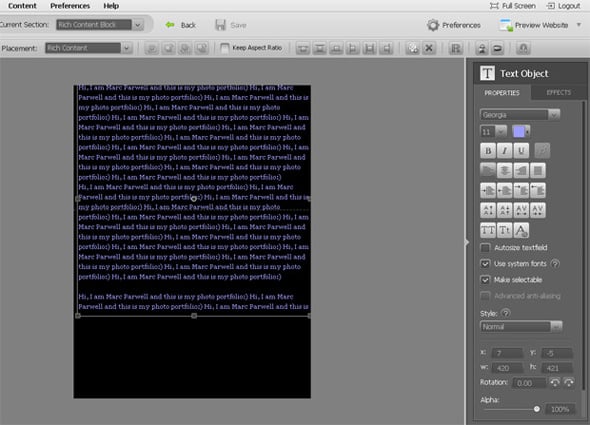
Also, you may edit the text according to the template design and your own preferences: you may easily change the font, its size and color.
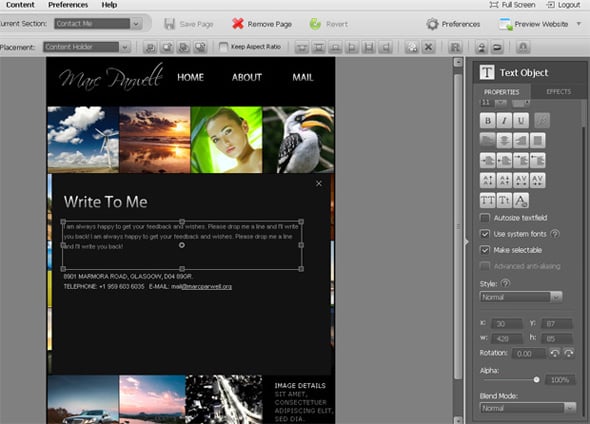
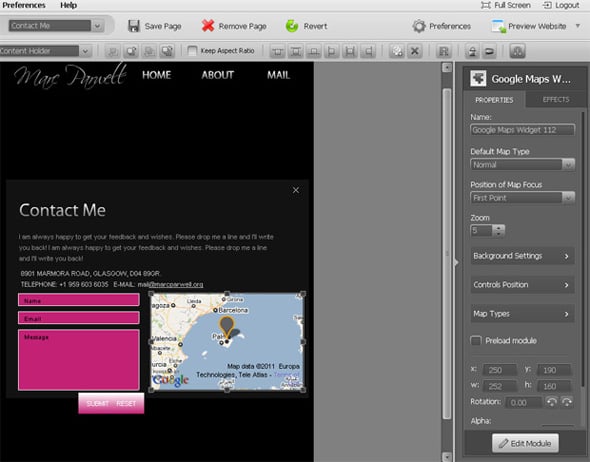
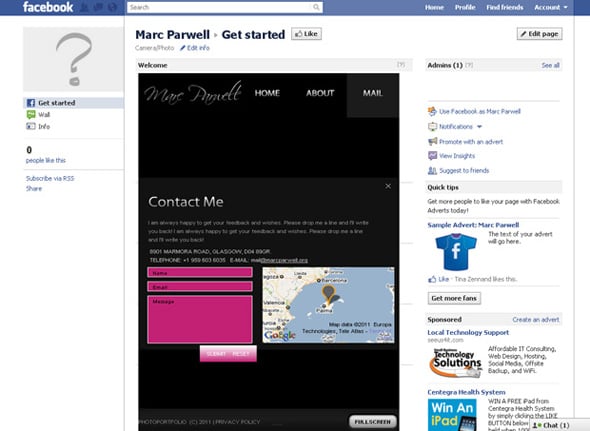
7. Now we go to the “Contact Me” page within the control panel and edit its content in the same way we edited the “About Me” page, and changed the website title with the help of the Logo Slot. Moreover, you may add a contact form due to the embedded Form Widget.
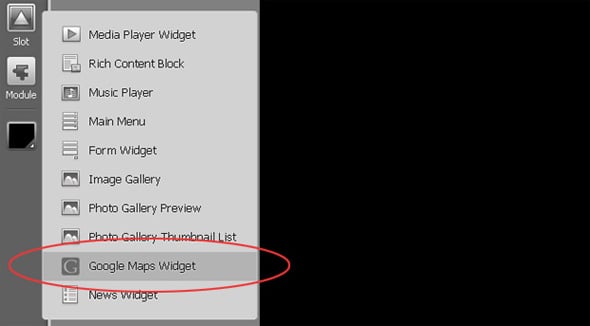
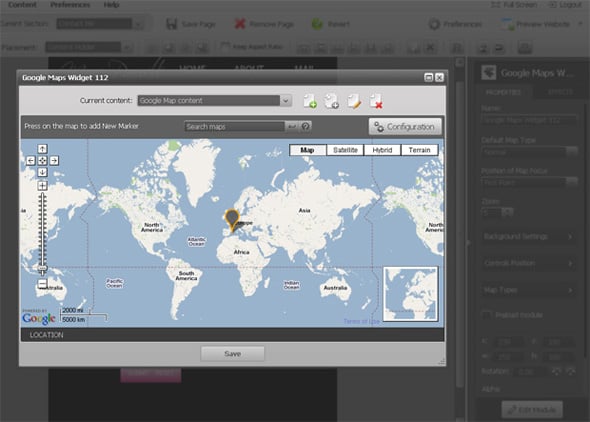
8. If you are interested in showing people your office location, you may add a Google map to your Facebook Flash website with the help of the Google Maps Widget.
Let’s add a map to the “Contact Me” page.
To embed a map, you should register your website and get Map API Key.
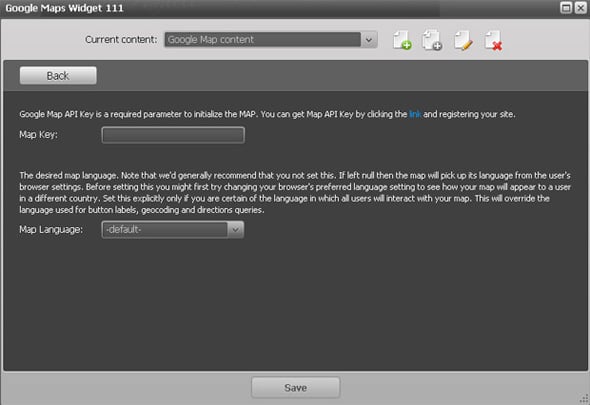
Within the module, you may set the latitude and longtitude, add a title and description for markers as well as place the unlimited number of markers on the map. Also, it is possible to specify the Default Map Type, set the zoom parameters, background settings, etc.
In addition to the above mentioned functionality, Moto CMS has other useful modules and slots, such as News Widget, RSS Feed, Media and MP3 player as well as modules, widgets and slots for a functional image gallery creation (Photo Gallery Preview, Photo Gallery Thumbnail List, etc.)
Well, we have finished editing the template; now it’s time to evaluate the final result:
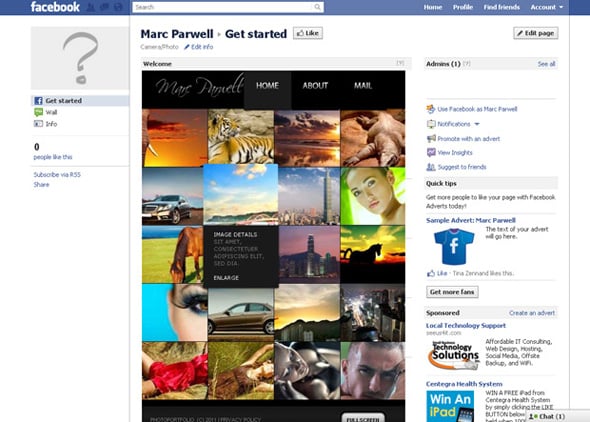
Home Page:
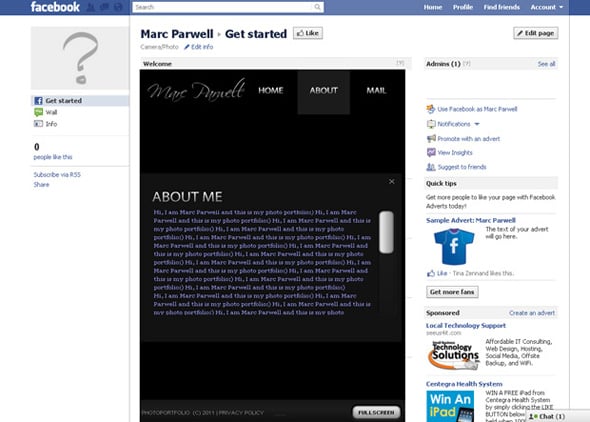
About Page:
Contact Page:
Browse through the entire collection of Facebook Flash CMS Templates and choose one for your own Facebook Fan Page!