

Hope you already set up your brand new website built with Moto CMS version 3 admin panel. It was easy, wasn’t it? Well, there can be situations when some of our users may spot minor issues with files installation or code injection.


This guide has specially been written for Moto CMS users in order to prevent such situations that may occur during Moto 3 content management system setup. Some cases can be easily solved if you rely on our 24/7 Tech Support service that will gladly help you with any troubleshooting. And there are some widespread errors that you can easily solve on your own with a few clicks. In most cases it is enough just to select the right mode or fill the necessary fields in correctly, and the website will work smoothly.
Practically, it is so easy to create a website with the help of our user-friendly Moto CMS; and if you keep underlying potential problems in mind, the setup process will go off without a hitch.
It is wise to learn from other’s mistakes, not from your own, isn’t it?
***
The MotoCMS template files haven’t been uploaded to the web server correctly.
Errors:
This is a widespread error among our users, unfortunately. If the customer uploads template files to the server without using the Binary code, the system fails to read them. It doesn’t return any error message to you, the system’s freezing.
SOLUTION: In this case you need to re-upload your website files in Binary Transfer Mode. Let’s find out how to do it correctly with the help of FileZilla FTP Client:
In case you need to re-upload all the template files to the web server, we have described the process from the beginning to end:
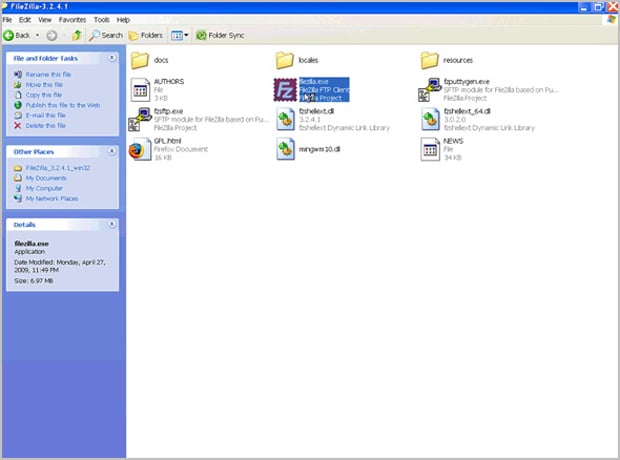
1. Run the file “FileZilla.exe” in the FileZilla program folder :

2. There are 3 fields you should fill in to connect to your web server: Host, Username and Password:
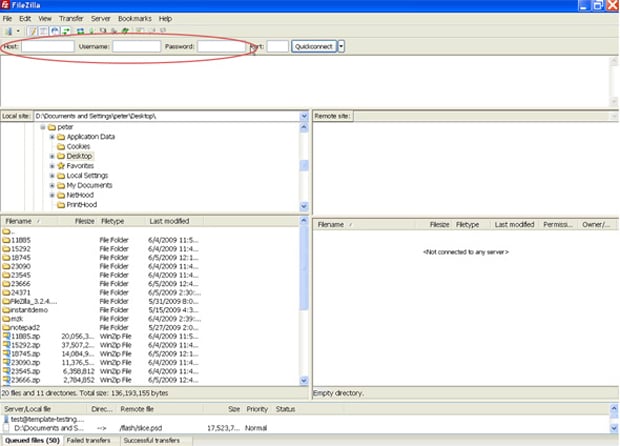

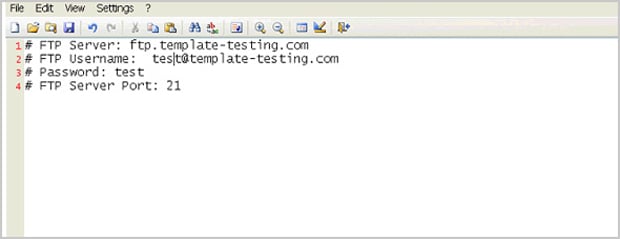
For that you will need the FTP details:
- FTP Server
- FTP Username
- FTP Password
- FTP Port (it is 21 by default for almost all FTP servers):

Copy the FTP details and paste them according to necessary allocations.
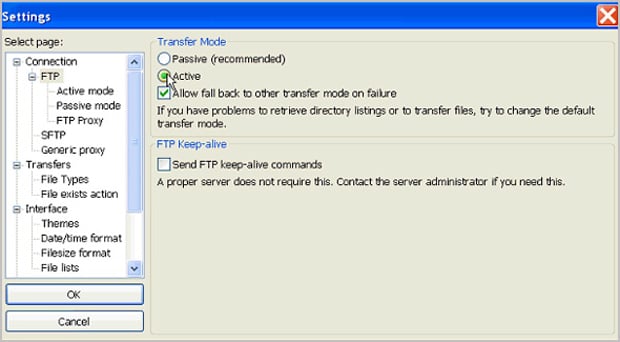
3. Depending on your web hosting, there are two types of connection: in Active Mode and in Passive Mode.
Open “Settings” in the “Edit” section:
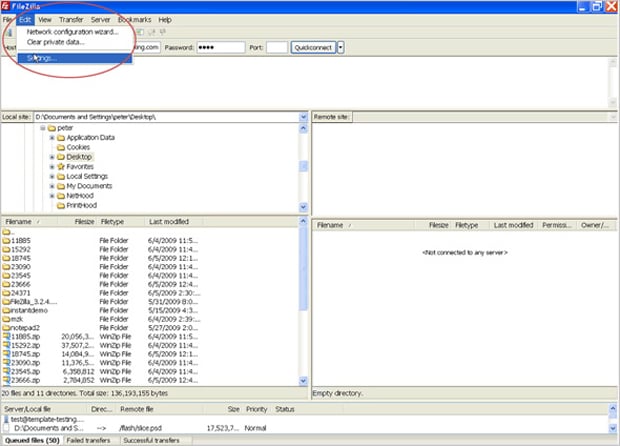
For our web servers we will use the “Active Mode”, so select FTP – Active:

After you have filled in all necessary fields, press the “Quickconnect” button in order to start the process of uploading files:

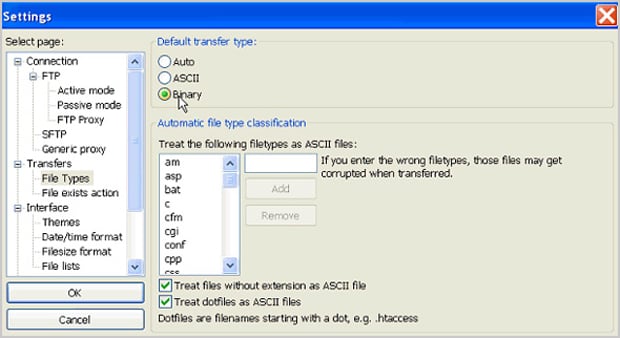
There are two modes that FileZilla offers for uploading files: ASCII Mode (CSS and HTML files) and Binary Mode (Image and applet files).
Here is the snag! You need to upload your files in the Binary Mode: Edit – Settings – Transfers – File Types – Binary.

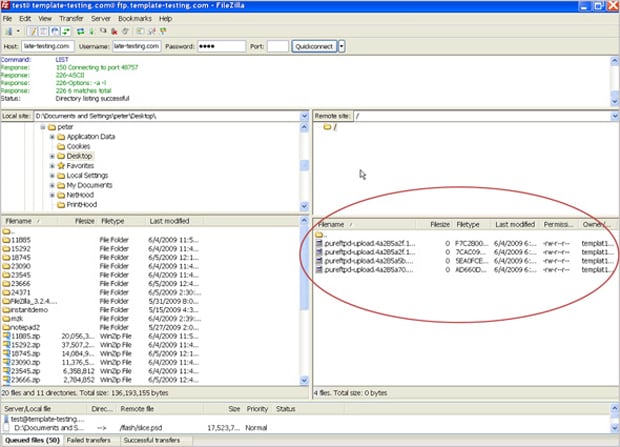
4. Now let’s upload our template:
Open the folder with the template, select all the files in it and drag them to the window with the uploaded files. That’s it – the uploading process has been started. After the files have been uploaded, in the “Status” field you will see the “File transfer successful” message:


5. Check the results out:

In case you only need to upload the “Admin” folder again after setting your FTP software to Binary Transfer Mode, the process is going to be even simpler. It’s already been described in one of our tutorials. Please follow this link to find out how to do it correctly.
***
Incorrect Permisssions
Errors:
Sometimes you can get the message “The File/Folder is not writable.”
SOLUTION: To correct this message you just need to set up the right permissions for the files. One of the possible ways is to re-upload your files in the Binary mode as it was explained in the previous section. Otherwise you should check the following files are set up to the right permissions:
Permissions set to 664 (-rw-rw-r–) for:
mt-includes/config/settings.php
mt-content/assets/styles.css
mt-content/assets/fonts.css
Permissions set to 775 (drwxrwxr-x) for the folders namely:
mt-content/assets
mt-content/assets/less~ apply the mentioned above permissions to all folders and files that are there
mt-content/uploads
mt-content/temp
mt-content/temp/update
mt-content/temp/logs
mt-content/temp/twig
mt-content/temp/cache
mt-content/themes/~ (apply the mentioned above permissions to all folders and files that are there)
mt-includes
mt-includes/templates
mt-includes/templates/layouts
mt-includes/templates/less
mt-includes/templates/emails
mt-includes/library
mt-includes/assets
mt-includes/widgets
mt-admin/views
mt-admin/update
All other files should have the permissions set to 644 (-rw-r–r–) and all of the folders left should have the permissions set to 755 (drwxr-xr-x).
***
Data Is Already Installed
Errors:
For this issue the system returns the following message to you:
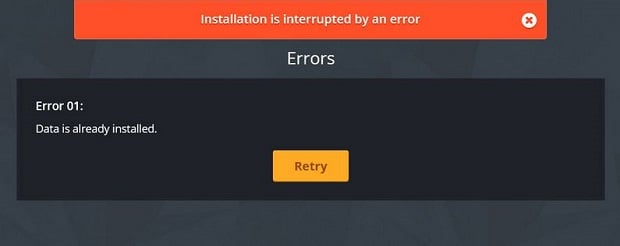

SOLUTION:
This issue may appear in case your previous data installation was interrupted by any means. In this case you should drop all unsuccessfully installed tables from your database and provide the template installation again. For this particular moment we don’t have a “Reset” button in MotoCMS 3 Admin Panel, but it may appear in future. For now you can visit this link and perform all the necessary manipulations step-by-step. In short, you will have to:
- Upload the settings.php file (attached to the above mentioned page) and replace with it your existing one in the /mt-includes/config/ folder on your server;
- Empty your database in phpMyAdmin control panel;
- Open your MotoCMS template using your admin name and set it up again. You can create a new database if you’re feeling unsure you can edit the existing database.
Check out the MotoCMS Help Center for the detailed info on the topic “How to revert my changes back to the original template in MotoCMS 3?”
***
Metrics Codes in Code Injection Section
Errors:
You can see the Metrics (Google Analytics, Yandex metrics etc.) working incorrectly at the attempt of adding their codes into the Code Injection section inside the template.
SOLUTION:
Metrics work differently from other third-party functionality providers. Setting them through the Code injection is incorrect.
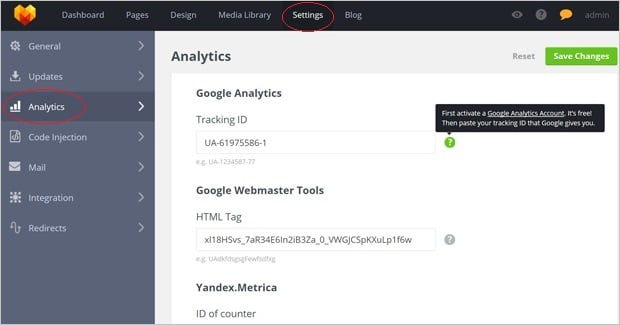

For analytics setup use MotoCMS 3 admin panel offers you a special section inside the Settings tab:
- Log into your MotoCMS template account;
- Go to the Settings Tab;
- Choose the Analytics Section on the left panel;
- Add your Google Analytics tracking ID or other tag following the hints next to each field.
***
Update Error
Errors:
You can get the “Update is interrupted by an error” message while installing the latest version of MotoCMS 3 to your template. This may happen if you don’t have ZipArchive php extension enabled on your server.
SOLUTION:
This issue is solved amazingly easy: you just need to kindly ask your hosting provider to enable on your server ZipArchive php extension. That’s it!
***
Issues with PHP Extensions
Errors:
“PHP extension Zend Guard Loader is not enabled”, “PHP extension mysql is not enabled”, “PHP extension json is not enabled” etc. You may get this kind of messages when any of the PHP extensions are not enabled.
SOLUTION:
The solution to all of such issues is also a snap – you just need to enable this extension. Usually, you can do it manually inside your Hosting admin panel. Otherwise – please, contact your hosting provider and kindly ask him to enable this or that PHP extension.
***
MotoCMS 3 Account Activation
Errors:
The latter seems not to be an issue since the first account activation usually goes automatically and smoothly. But if you transfer or re-install your template to another server, you can face activation process again. You will see the following message: “Your product is not activated yet. Please enter your account by using “Activate” button and specify server’s external IP address and domain name details, which are presented below.”
SOLUTION:
When you see the above specified message, you should enter your server’s external IP address and Domain name into the required fields. Press the “Activate” button to confirm.
If you’re not sure of these details, you can always contact your hosting provider for them. If the issue occurs again – please, submit a ticket to our tech support team.
These are the major issues you may face while using MotoCMS 3. Most of them concern installation process or some technical details. The work with the template itself is very easy and smooth even for a person who never tried building a website before.
P.S. This post is an update to our previous article about mistakes for earlier MotoCMS versions. If you face any issues with the use of MotoCMS 3 admin panel, you can contact our support team (support@motocms.com) that will kindly help you with most of these issues.