Creating Flash Website with Moto CMS Standalone – Part 4: Company Name and Slogan Animation
Please meet the Part 4 of our tutorial series on how to create Flash website with Moto CMS standalone. From the Part 1, Part 2 and Part 3 you learned to create a simple website. In the Part 4 we will teach you to animate the company name and slogan. Ok, here we go…
At the moment the company name and slogan are inserted as the text objects.
Creating the Company Name Slot
1. Let’s press Ctrl+F8 to create a new symbol. We name it CompanyNameSlot, check the “Export for ActionScript” box, and set Class: CompanyNameSlot. The Base class should be:
slots.CompanyNameSlot.as
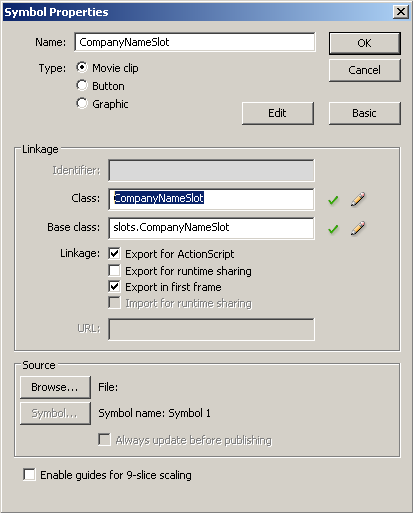
We should go to the scrslots folder and create an empty CompanyNameSlot.as file before clicking OK (create the “slots” folder if there is no such folder in “src”).
2. Now we open this Movie Clip, press R to select a rectangle tool, and draw a shape on the stage.
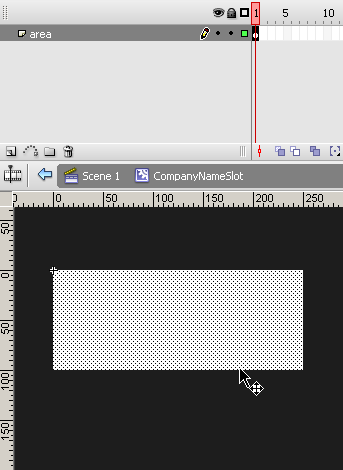
We put it to zero coordinates and pressing F8 to convert it to Symbol. Let’s name it “area”, as it will be the hit area for our slot.
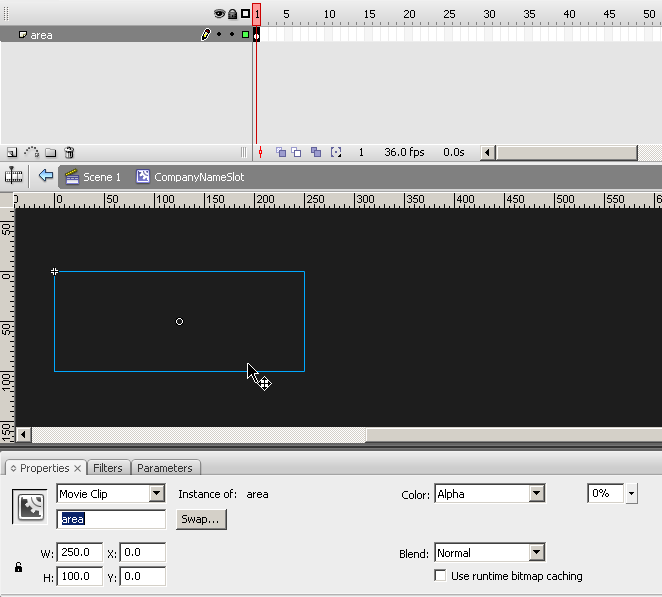
Then we should select this new Movie Clip, specify the instance name – “area”, and set Color: Alpha = 0% for it.
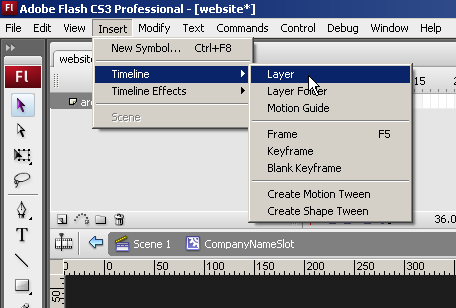
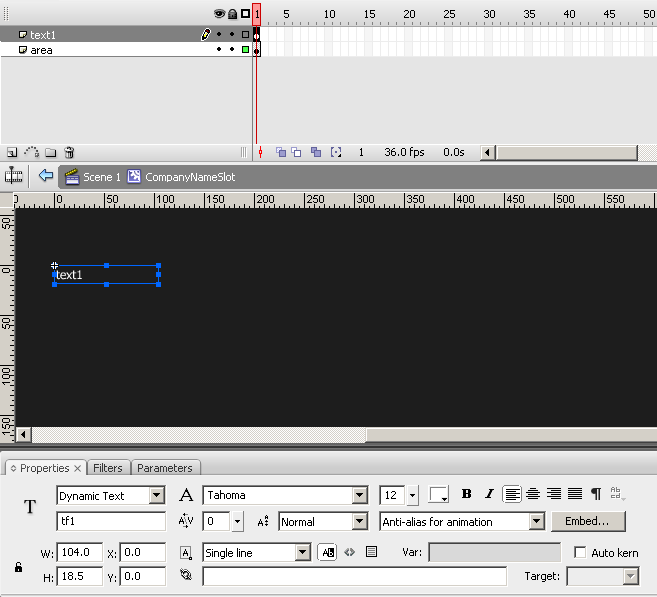
3. Now let’s insert a new layer and name it “text1”.
We press T to activate a text tool and add a text field to the stage. We set it as Dynamic Text and specify the instance name as “tf1”. Please, check that there are no embedded symbols for this text field. We add some text to this field, but we’ll remove it when the animation is created.
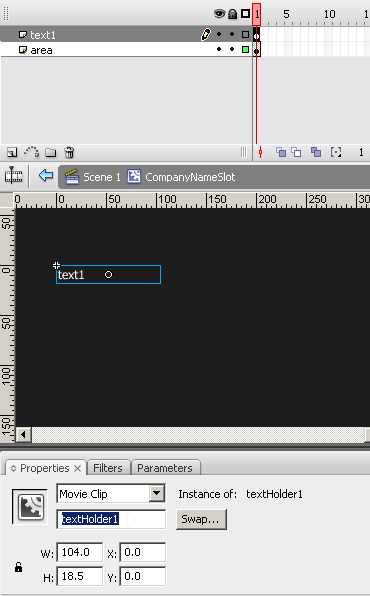
We press F8 to convert it to Symbol. Let’s name it textHolder1 and specify the same instance name.
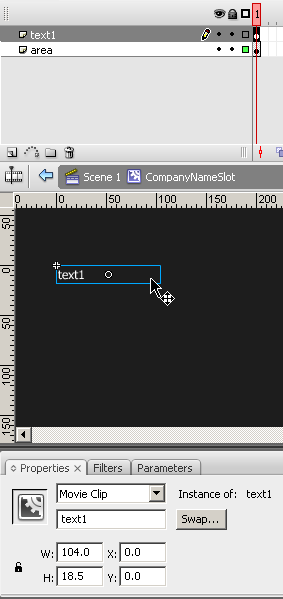
And we convert it to Symbol again. We need to do it because we will have to set the text coordinates in the script. We name this new Movie Clip as “text1” and give it the same instance name.
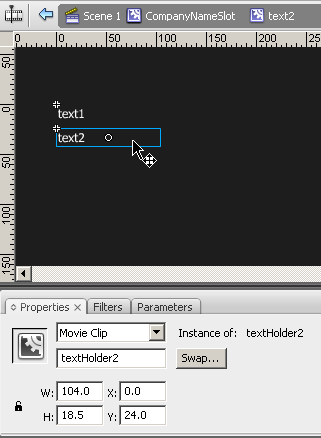
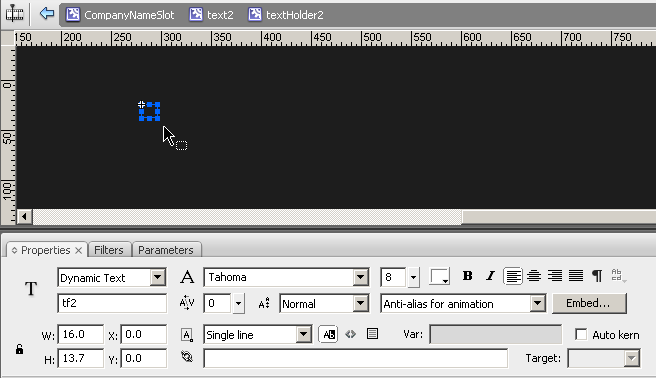
4. Now we should insert a new layer, name it text2, and create the second text field the same way as we created the first one. We’ll use 2 instead of 1 in all the new Movie Clips and instance names: tf2, textHolder2, text2.

Let’s open the text2 Movie Clip and move textHolder2 down, so that we can see both textfields on timeline.
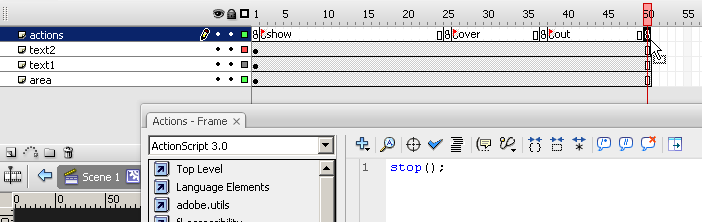
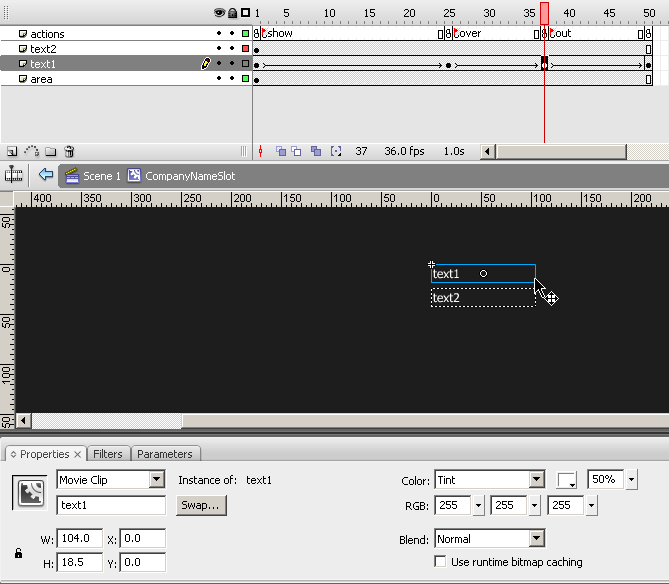
5. Ok, now we’ll add a new layer and name it “actions”. It will be a layer for labeled frames and keyframes with the stop code. Let’s choose all layers and extend frames using F5 key.

Then we create keyframes (F6) on the actions layer and specifty frame labels: show, over, out.
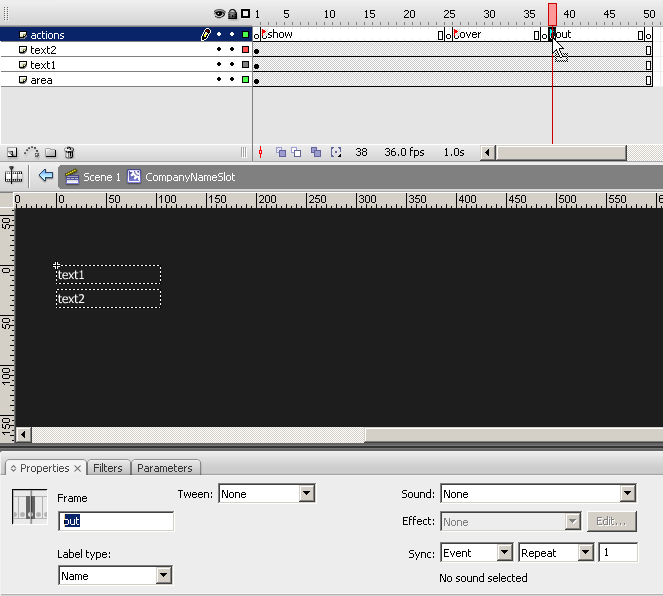
We should also add the “stop();” code before every labeled keyframe and in the last frame.
Creating Animation
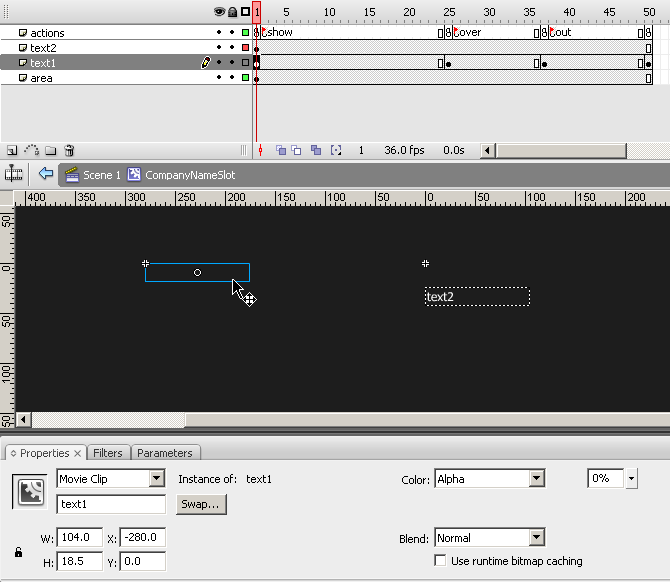
1. Let’s create keyframes on the “text1” layer under keyframes with the stop code. Then we move the text1 Movie Clip to the left in the first keyframe. We also set Alpha 0% for it.
2. We can right-click on this frame and choose Create Motion Tween. We should also set Ease: 100 (out).
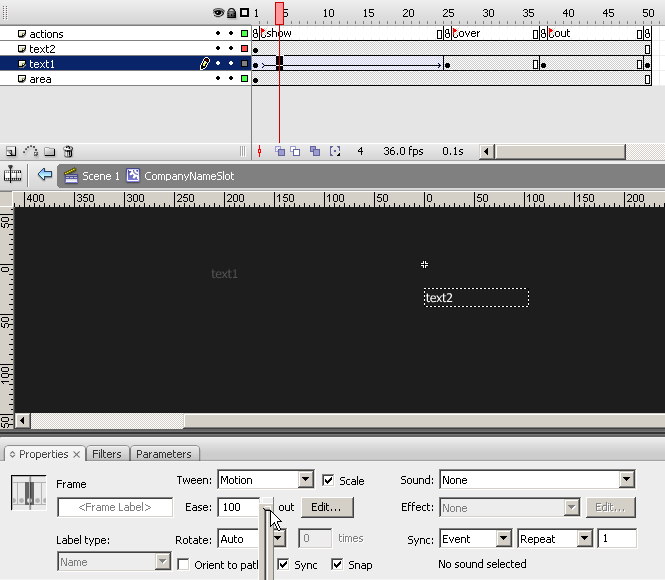
3. We have created the appearing animation. Now let’s go to the third keyframe – this will be the state on mouseover. We select the Movie Clip and set Color: Tint with white color and 50% tint amount. Then we create Motion Tweens before and after this frame.
4. Let’s make the same animation for text2, but move it to the right in the first keyframe, so that the textfields appear from different sides.

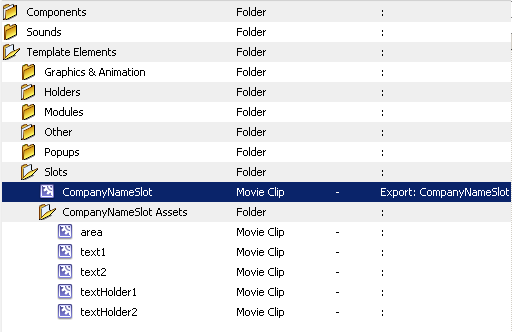
5. Now we remove texts from both textfields. At the moment we have several Movie Clips in the library root. We can move them to the Slots folder in order to keep all the elements arranged.
Creating Script for the Slot
The animation in Flash is ready, and now it’s time to create the script for our slot. Let’s open the CompanyNameSlot.as file which we have created in the beginning of the article and add the basic code:
package slots
{
  import com.moto.template.shell.view.components.AbstractMotoSlot;

  public class CompanyNameSlot extends AbstractMotoSlot
  {
    public function CompanyNameSlot()
    {
      super();

    }

  }
}
As you can see, we inherit the AbstractMotoSlot class from the Moto CMS Component. Then we override the init function and call the appearing animation. And we also import MotoObjectVO:
package slots
{
  import com.moto.template.shell.view.components.AbstractMotoSlot;
  import com.moto.template.shell.model.vo.MotoObjectVO;

  public class CompanyNameSlot extends AbstractMotoSlot
  {
    public function CompanyNameSlot()
    {
      super();

    }

    override public function init(vo:MotoObjectVO):void
    {
      super.init(vo);

      gotoAndPlay("show");
    }

  }
}
Now let’s create new variables and assign them to the slot’s elements. We also add TextField and MovieClip to imports:
package slots
{
  import com.moto.template.shell.view.components.AbstractMotoSlot;
  import com.moto.template.shell.model.vo.MotoObjectVO;
  import flash.text.TextField;
  import flash.geom.Rectangle;

  public class CompanyNameSlot extends AbstractMotoSlot
  {
    private var _tf1:TextField;
    private var _tf2:TextField;
    private var _area:MovieClip;
    private var _textHolder1:MovieClip;
    private var _textHolder2:MovieClip;

    public function CompanyNameSlot()
    {
      super();

      _area = getChildByName("area") as MovieClip;
      _textHolder1 = text1.getChildByName("textHolder1") as MovieClip;
      _textHolder2 = text2.getChildByName("textHolder2") as MovieClip;
      _tf1 = _textHolder1.getChildByName("tf1") as TextField;
      _tf2 = _textHolder2.getChildByName("tf2") as TextField;
    }

    override public function init(vo:MotoObjectVO):void
    {
      super.init(vo);

      gotoAndPlay("show");
    }

  }
}
Then we disable mouseChildren, specify hitArea, and set parameters of our textfields:
    public function CompanyNameSlot()
    {
      super();

      _area = getChildByName("area") as MovieClip;

      mouseChildren = false;
      hitArea = _area;

      _textHolder1 = text1.getChildByName("textHolder1") as MovieClip;
      _textHolder2 = text2.getChildByName("textHolder2") as MovieClip;

      _tf1 = _textHolder1.getChildByName("tf1") as TextField;
      _tf1.autoSize = "left";
      _tf1.wordWrap = false;
      _tf1.multiline = false;
      _tf1.selectable = false;

      _tf2 = _textHolder2.getChildByName("tf2") as TextField;
      _tf2.autoSize = "left";
      _tf2.wordWrap = false;
      _tf2.multiline = false;
      _tf2.selectable = false;
    }
Now let’s override the updateProperty method and add a switch statement with two cases. We also add PropertyVO to imports:
package slots
{
  import com.moto.template.shell.view.components.AbstractMotoSlot;
  import com.moto.template.shell.model.vo.MotoObjectVO;
  import com.moto.template.shell.model.vo.PropertyVO;
  import flash.text.TextField;
  import flash.geom.Rectangle;

  public class CompanyNameSlot extends AbstractMotoSlot
  {
    private var _tf1:TextField;
    private var _tf2:TextField;
    private var _area:MovieClip;
    private var _textHolder1:MovieClip;
    private var _textHolder2:MovieClip;

    public function CompanyNameSlot()
    {
      super();

      _area = getChildByName("area") as MovieClip;

      mouseChildren = false;
      hitArea = _area;

      _textHolder1 = text1.getChildByName("textHolder1") as MovieClip;
      _textHolder2 = text2.getChildByName("textHolder2") as MovieClip;

      _tf1 = _textHolder1.getChildByName("tf1") as TextField;
      _tf1.autoSize = "left";
      _tf1.wordWrap = false;
      _tf1.multiline = false;
      _tf1.selectable = false;

      _tf2 = _textHolder2.getChildByName("tf2") as TextField;
      _tf2.autoSize = "left";
      _tf2.wordWrap = false;
      _tf2.multiline = false;
      _tf2.selectable = false;
    }

    override public function updateProperty(property:PropertyVO):void {
      super.updateProperty(property);

      switch (property.propertyType) {
        case 1 :
          {

            break;
          };
        case 2 :
          {

            break;
          };
            }
    }

    override public function init(vo:MotoObjectVO):void
    {
      super.init(vo);

      gotoAndPlay("show");
    }

  }
}
We will use the setHTMLTextFromPropertyVO method to assign the text to the textfields. The text will be set in the control panel.
      switch (property.propertyType) {
        case 1 :
          {
            MotoUtils.setHTMLTextFromPropertyVO(_tf1, property);
            break;
          };
        case 2 :
          {
            MotoUtils.setHTMLTextFromPropertyVO(_tf2, property);
            break;
          };
            }
We should also add MotoUtils to imports:
import com.moto.template.common.utils.MotoUtils;
Now we should add logic which will position our objects. Let’s override the setSize method:
package slots
{
  import com.moto.template.shell.view.components.AbstractMotoSlot;
  import com.moto.template.shell.model.vo.MotoObjectVO;
  import com.moto.template.shell.model.vo.PropertyVO;
  import com.moto.template.common.utils.MotoUtils;
  import flash.text.TextField;
  import flash.geom.Rectangle;

  public class CompanyNameSlot extends AbstractMotoSlot
  {
    private var _tf1:TextField;
    private var _tf2:TextField;
    private var _area:MovieClip;
    private var _textHolder1:MovieClip;
    private var _textHolder2:MovieClip;

    public function CompanyNameSlot()
    {
      super();

      _area = getChildByName("area") as MovieClip;

      mouseChildren = false;
      hitArea = _area;

      _textHolder1 = text1.getChildByName("textHolder1") as MovieClip;
      _textHolder2 = text2.getChildByName("textHolder2") as MovieClip;

      _tf1 = _textHolder1.getChildByName("tf1") as TextField;
      _tf1.autoSize = "left";
      _tf1.wordWrap = false;
      _tf1.multiline = false;
      _tf1.selectable = false;

      _tf2 = _textHolder2.getChildByName("tf2") as TextField;
      _tf2.autoSize = "left";
      _tf2.wordWrap = false;
      _tf2.multiline = false;
      _tf2.selectable = false;
    }

    override public function updateProperty(property:PropertyVO):void {
      super.updateProperty(property);

      switch (property.propertyType) {
        case 1 :
          {
            MotoUtils.setHTMLTextFromPropertyVO(_tf1, property);
            break;
          };
        case 2 :
          {
            MotoUtils.setHTMLTextFromPropertyVO(_tf2, property);
            break;
          };
            }
    }

    override public function init(vo:MotoObjectVO):void
    {
      super.init(vo);

      gotoAndPlay("show");
    }

    override public function setSize(newWidth:Number, newHeight:Number):void {
      super.setSize (newWidth, newHeight);

    }

  }
}
Then we add a condition which checks which textfield is wider and sets the area width equal to its width:
    override public function setSize(newWidth:Number, newHeight:Number):void {
      super.setSize (newWidth, newHeight);

      if (_tf1.width > _tf2.width)
      {
        _area.width = _tf1.width;
      }
      else
      {
        _area.width = _tf2.width;
      }

    }
We should center our textHolders relatively to the area width:
    override public function setSize(newWidth:Number, newHeight:Number):void {
      super.setSize (newWidth, newHeight);

      if (_tf1.width > _tf2.width)
      {
        _area.width = _tf1.width;
      }
      else
      {
        _area.width = _tf2.width;
      }

      _textHolder1.x = int((_area.width - _tf1.width) / 2);
      _textHolder2.x = int((_area.width - _tf2.width) / 2);

    }
And finally we set the second textHolder Y coordinate, which equals the first textfield’s height, and set the area height equal to the sum of the first and the second textfields’ heights:
    override public function setSize(newWidth:Number, newHeight:Number):void {
      super.setSize (newWidth, newHeight);

      if (_tf1.width > _tf2.width)
      {
        _area.width = _tf1.width;
      }
      else
      {
        _area.width = _tf2.width;
      }

      _textHolder1.x = int((_area.width - _tf1.width) / 2);
      _textHolder2.x = int((_area.width - _tf2.width) / 2);
      _textHolder2.y = _tf1.textHeight;
      _area.height = _tf1.textHeight + _tf2.textHeight;
    }
Let’s get back to the updateProperty method and call setSize after the text is set. In both cases we specify the textfield’s width and height. And we also call the updateDimensions method, which will update the selection frame dimensions when the text is changed in the control panel:
      override public function updateProperty(property:PropertyVO):void {
      super.updateProperty(property);

      switch (property.propertyType) {
        case 1 :
          {
            MotoUtils.setHTMLTextFromPropertyVO(_tf1, property);
            setSize (_tf1.textWidth, _tf1.textHeight);
            updateDimensions();
            break;
          };
        case 2 :
          {
            MotoUtils.setHTMLTextFromPropertyVO(_tf2, property);
            setSize (_tf2.textWidth, _tf2.textHeight);
            updateDimensions();
            break;
          };
            }
    }
And the last step in the script editing will be overriding the getDimensions method, which sets the selection frame dimensions when the slot is selected in the control panel. We specify the area’s width and height:
    override public function getDimensions():Rectangle
    {
      return new Rectangle(0, 0, _area.width, _area.height);
    };
We import the Rectangle class:
import flash.geom.Rectangle;
Here is the final code:
package slots
{
  import com.moto.template.shell.view.components.AbstractMotoSlot;
  import com.moto.template.shell.model.vo.MotoObjectVO;
  import com.moto.template.shell.model.vo.PropertyVO;
  import com.moto.template.common.utils.MotoUtils;
  import flash.display.MovieClip;
  import flash.text.TextField;
  import flash.geom.Rectangle;

  public class CompanyNameSlot extends AbstractMotoSlot
  {
        private var _tf1:TextField;
    private var _tf2:TextField;
    private var _area:MovieClip;
    private var _textHolder1:MovieClip;
    private var _textHolder2:MovieClip;

    public function CompanyNameSlot()
    {
      super();

      _area = getChildByName("area") as MovieClip;

      mouseChildren = false;
      hitArea = _area;

      _textHolder1 = text1.getChildByName("textHolder1") as MovieClip;
      _textHolder2 = text2.getChildByName("textHolder2") as MovieClip;

      _tf1 = _textHolder1.getChildByName("tf1") as TextField;
      _tf1.autoSize = "left";
      _tf1.wordWrap = false;
      _tf1.multiline = false;
      _tf1.selectable = false;

      _tf2 = _textHolder2.getChildByName("tf2") as TextField;
      _tf2.autoSize = "left";
      _tf2.wordWrap = false;
      _tf2.multiline = false;
      _tf2.selectable = false;
    }

    override public function updateProperty(property:PropertyVO):void {
      super.updateProperty(property);

      switch (property.propertyType) {
        case 1 :
          {
            MotoUtils.setHTMLTextFromPropertyVO(_tf1, property);
            setSize (_tf1.textWidth, _tf1.textHeight);
            updateDimensions();
            break;
          };
        case 2 :
          {
            MotoUtils.setHTMLTextFromPropertyVO(_tf2, property);
            setSize (_tf2.textWidth, _tf2.textHeight);
            updateDimensions();
            break;
          };
            }
    }

    override public function init(vo:MotoObjectVO):void
    {
      super.init(vo);

      gotoAndPlay("show");
    }

    override public function setSize(newWidth:Number, newHeight:Number):void {
      super.setSize (newWidth, newHeight);

      if (_tf1.width > _tf2.width)
      {
        _area.width = _tf1.width;
      }
      else
      {
        _area.width = _tf2.width;
      }

      _textHolder1.x = int((_area.width - _tf1.width) / 2);
      _textHolder2.x = int((_area.width - _tf2.width) / 2);
      _textHolder2.y = _tf1.textHeight;
      _area.height = _tf1.textHeight + _tf2.textHeight;
    }

    override public function getDimensions():Rectangle
    {
      return new Rectangle(0, 0, _area.width, _area.height);
    };
  }
}
Now we can compile our project and open the structure.xml file which is placed in the “xml” folder. Let’s add a new node to the slots section (you can find the tag and add the new node before it):
<slot id="3" librarySymbolLinkage="CompanyNameSlot" resizable="true" animated="true" mainPropertyID="1">
 <name><![CDATA[Company Name Slot]]></name>
 <properties>
 <property id="1" type="htmlText">
 <name><![CDATA[Company Name]]></name>
 </property>
 <property id="2" type="htmlText">
 <name><![CDATA[Slogan]]></name>
 </property>
 </properties>
 <template alpha="1">
 <properties>
 <item propertyType="1"><![CDATA[]]></item>
 <item propertyType="2"><![CDATA[]]></item>
 </properties>
 </template>
</slot>
id=”” – the unique slot ID; please, check that no other slot has the same ID.
librarySymbolLinkage=” “ – the export name of the slot’s MovieClip (Class name in the linkage properties).
animated=”” – an attribute which states whether the slot is animated or not.
resizable=”” – states whether there is the logic for resizing inside the slot or not.
<name><![CDATA[]]></name> – a name of the slot in the admin panel.
<properties/> – properties of the slot which extend functionality; we set two properties (Company Name and Slogan), which will let us set text data to our textfields.
<template/> – default values of all slot properties; we enter two items for our two properties and leave them empty.
Adding the Slot to the Stage
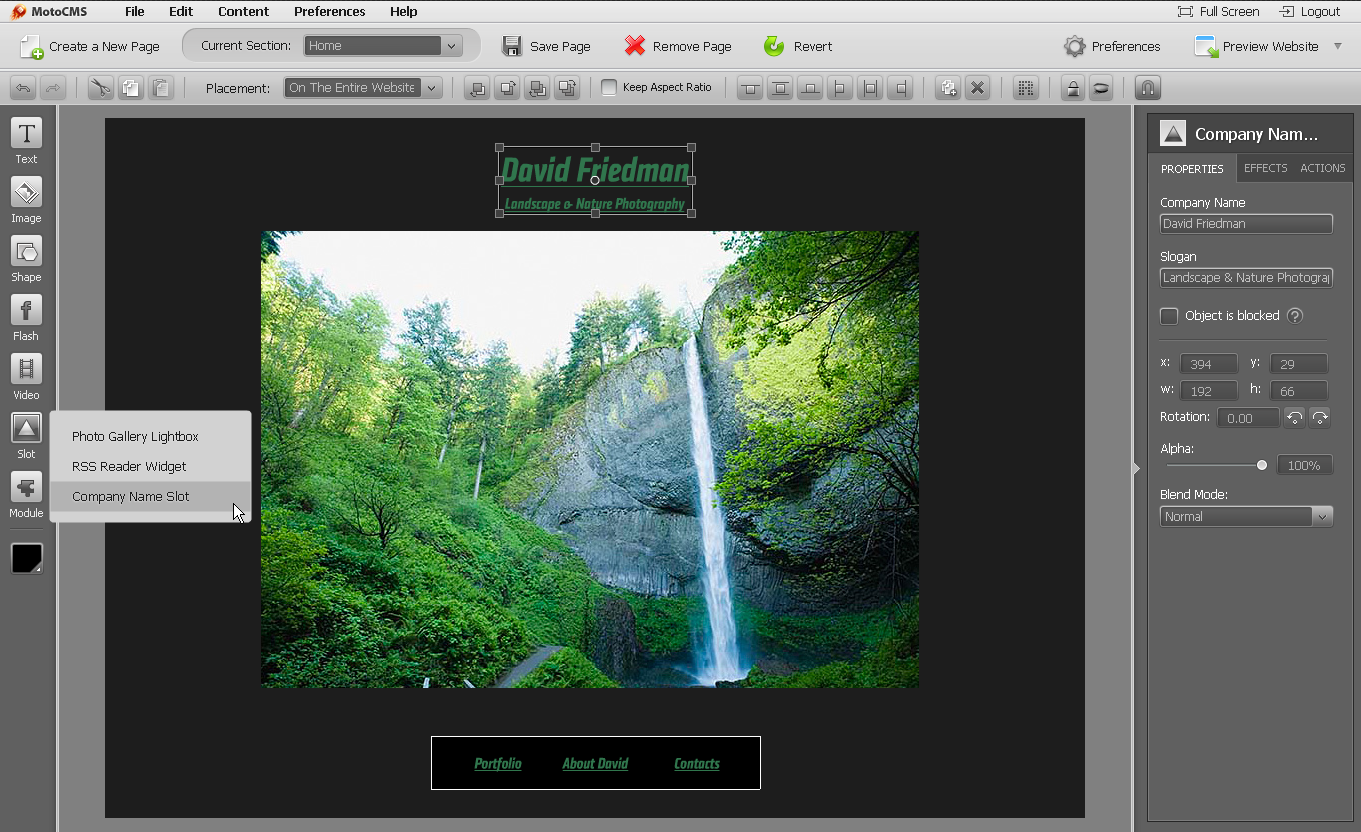
Now we can open the control panel and add our slot to the stage. It can be found in the Slot menu. When the slot is added, we can set Company Name and Slogan texts on the right panel. Then we remove the company name which was inserted as a text object, and place our slot instead of it. Let’s also go to the Actions tab, check Enable Click Action, choose Go to page and select Home page. Now clicking our slot on any page will lead us to the start page.
You can create as many slots as you want, and use them to animate different elements of your website: buttons, images, shapes, etc.
In the next (that is going to be the last) part of our tutorial we will animate holders and finally finish our Moto CMS based website. You will be able to see the final result and browse through the newly created Flash website.
Register a 30 Day Free Trial and try Moto CMS standalone in action before the purchase!


[…] Part 1, Part 2, Part 3, Part 4. […]
Like always, newbie has problems 🙂
Everything went ok, but now, in the end, when I’m trying to add the slot into the stage, nothing appears there…
I checked Id’s, linkage, script, everything it’s ok, like in tut. May be some bug in AS script?
I double-checked everything.. there is something I’m missing?
The other simple slot I just made worked well (no text fields, no script, just an imported png and xml updates)
Best regards and a BIG Thank You for this nice-detalied tutorial 🙂
M.J.
@Mountin Joan
We’d recommend you to contact our 24/7 support for qualified help. You can submit a request here: http://support.cms-guide.com/anonymous_requests/new .